
Cement crafts have a reputation for being simple: mix some powder with water, pour it into a mold, wait, and you’re done.
In practice, that approach is exactly why so many homemade pieces end up cracked, crumbly, rough, or stuck inside their molds.
Small decorative casts need a different mindset from driveway or patio concrete. The material, mold, water level, curing process, finishing, and even cleanup method can all affect the result. Standard concrete mixes often contain coarse gravel or stone, which makes sense for structural applications but can make small decorative objects harder to cast smoothly.
The good news is that you don’t need a professional workshop to make attractive cement decor.
With a fine-particle craft mix, a suitable mold, controlled moisture, and a little patience, you can create modern trays, planters, candle holders, bookends, ornaments, and other pieces that look surprisingly sophisticated.
These 19 DIY cement craft ideas focus on projects that can actually work in a normal home, while the practical guide afterward explains how to choose materials, prepare molds, mix correctly, cure your pieces, protect furniture, and clean up without creating a plumbing problem.
1. Cast a Minimalist Cement Catchall Tray
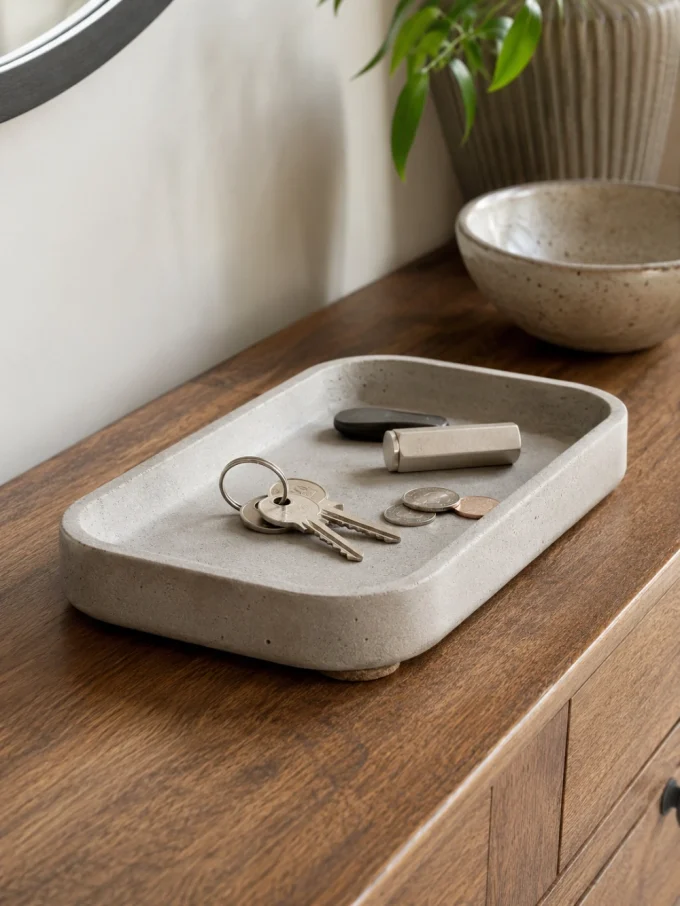
A shallow cement tray is one of the best first projects because the shape is simple and the finished piece can work almost anywhere.
Use a rectangular, oval, or softly rounded mold and keep the design relatively flat. Once cured, the tray can hold keys in an entryway, perfume bottles on a dresser, or small objects on a coffee table.
For a modern finish, leave the natural gray surface exposed and sand the edges smooth.
You can also create a two-tone version by adding a small amount of mineral-compatible pigment to one section of the mix.
The important detail is the underside. Add cork or felt pads after finishing so the cement doesn’t scratch a wood or painted surface.
For more ideas on combining small decorative objects into a finished arrangement, see DecoralCove’s coffee table styling ideas.
2. Make Geometric Cement Bookends
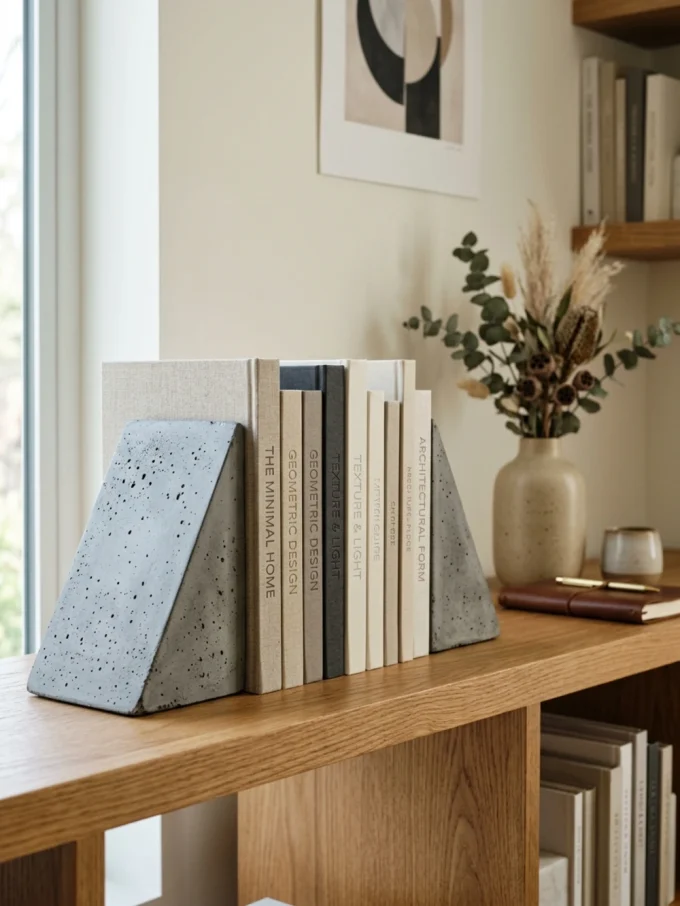
Bookends are particularly well suited to cement because the material’s weight becomes part of the function.
Instead of making a complicated shape, try a triangle, half-circle, arch, rectangular block, or stepped geometric form.
You can make a matching pair or intentionally create two slightly different shapes from the same color.
For a sophisticated look, keep the surface matte and pair the bookends with books, warm wood, and neutral accessories.
The finished pieces can work in a living room, bedroom, office, or open shelving unit.
If you like the idea of giving old pieces a new purpose, you can also combine cement accents with gorgeous upcycled furniture ideas.
3. Create a Small Cement Planter
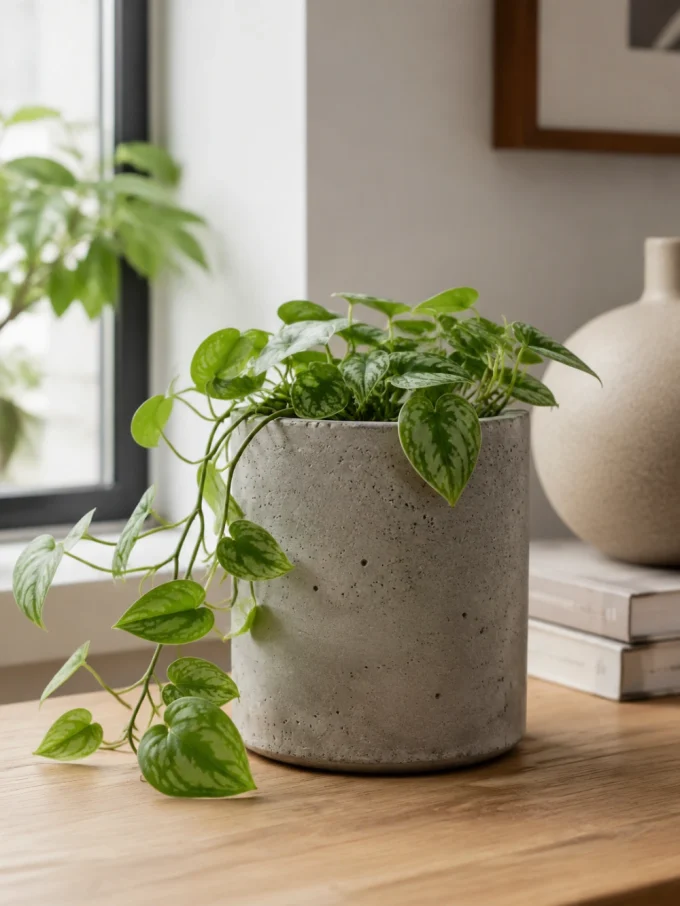
Cement planters remain popular because the material naturally complements greenery.
For a beginner project, use two containers to create the outer and inner shape. Flexible silicone molds are another good option because they make removal easier.
Keep the planter relatively small for your first attempt. Larger casts become heavier and can be more difficult to handle.
Remember that cement-based materials are porous. If the planter will regularly hold moisture, use an appropriate sealer for the intended application and provide drainage rather than allowing water to remain trapped inside.
A simple cylindrical planter looks particularly good with trailing plants, succulents, or sculptural foliage.
4. Pour a Ribbed Cement Candle Holder
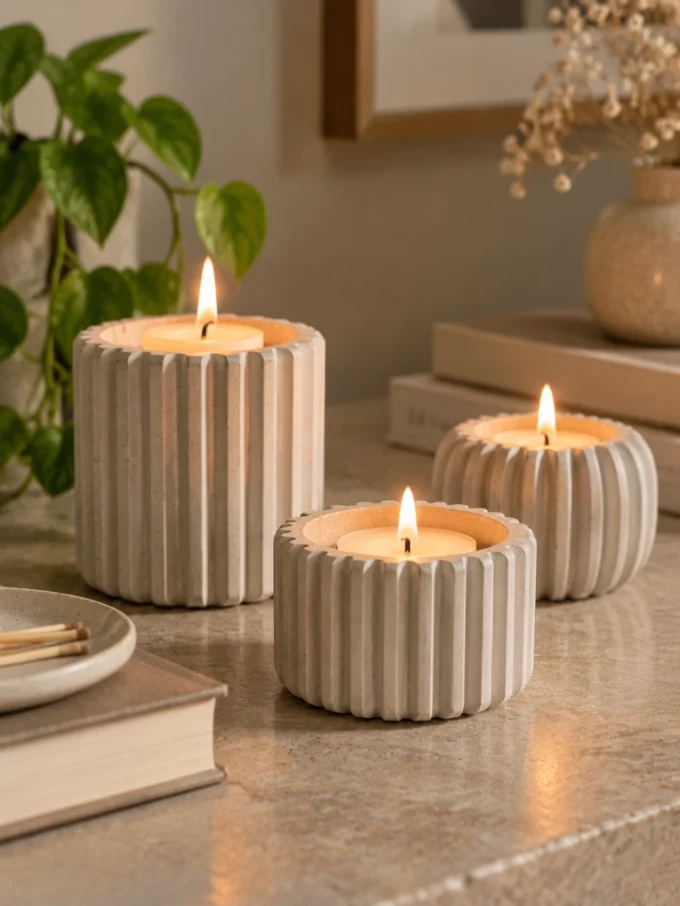
Texture can make a simple cement object look much more expensive.
Try a silicone mold with vertical ribs, scallops, arches, or another repeating pattern. Once the cement has cured, the mold creates the decoration without requiring you to carve anything by hand.
For a softer appearance, use an off-white or warm-gray pigment instead of traditional concrete gray.
Small candle holders also make good gifts because you can produce several from one mold.
If the holder will contain a candle, make sure the mold and finished design are appropriate for the candle type and heat exposure. Don’t assume that every decorative cement vessel is automatically suitable for an open flame.
5. Shape a Cement Incense Holder
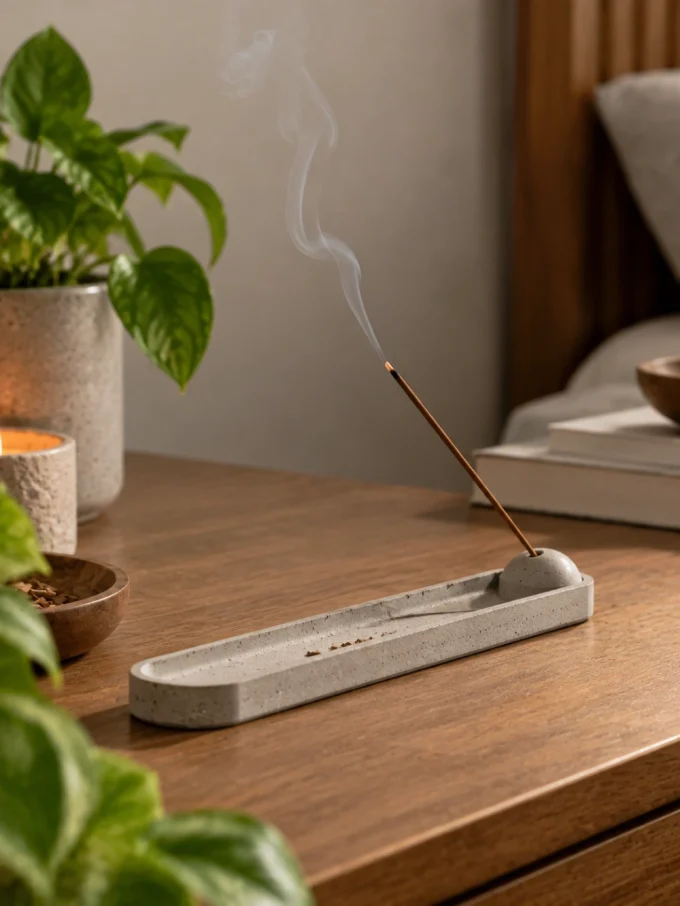
A narrow incense holder is another project where a simple form can have a strong visual impact.
Create a long, slim base with a small opening at one end for the incense stick.
The finished object can sit on a bedside table, meditation corner, or shelf without taking up much space.
Smooth the edges carefully after curing because the thin profile can make rough edges more noticeable.
Keep the design minimal. A plain gray cement holder can look more refined than one covered with paint or decorative embellishments.
6. Make Sculptural Cement Vases
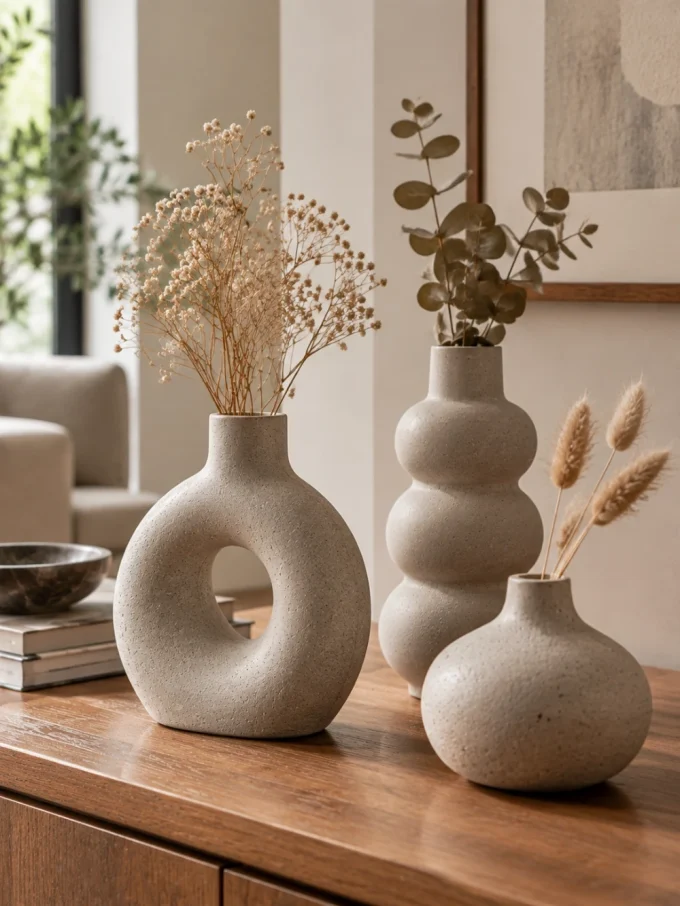
You don’t always need to make a functional planter.
A small sculptural cement vase can work as a decorative object even when it contains dried flowers or a faux botanical arrangement.
Experiment with rounded molds, narrow necks, asymmetrical silhouettes, or stacked geometric forms.
This is one place where imperfections can actually help. A subtle variation in texture can give the object a handmade quality rather than making it look factory-produced.
If you want to introduce greenery elsewhere in the home, DecoralCove’s bathroom plant decor ideas also show how natural elements can soften hard surfaces.
7. Cast Cement Coasters With Cork Backing
Cement coasters are practical, inexpensive, and relatively easy to make in batches.
Use shallow silicone molds and aim for a consistent thickness so the finished set looks intentional.
You can keep them plain or add subtle geometric sections using contrasting pigment.
Once cured and finished, attach cork or felt to the underside.
That backing is not just decorative. A cement coaster can be abrasive, so the soft layer protects the surface underneath.
Commercial DIY concrete coaster instructions similarly use molds, tapping to settle the mix, sanding rough edges, and cork on the underside to protect furniture.
8. Build a Cement Jewelry Dish
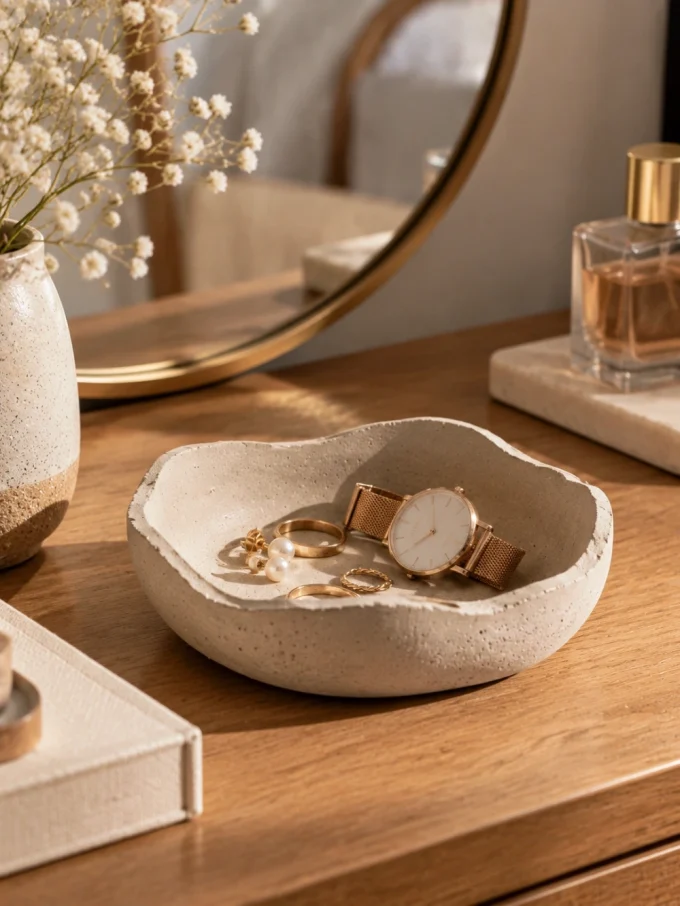
A small irregular dish can become a useful landing spot for rings, earrings, watches, or other small items.
Rather than creating a perfectly symmetrical bowl, consider a gently uneven edge.
This works especially well with the wabi-sabi side of minimalist interiors, where slight variation gives handmade objects character.
Keep the inside smooth enough to avoid catching delicate jewelry.
A pale cement color paired with brass, wood, or natural stone accessories can create a sophisticated bedside or dressing-table arrangement.
9. Make Modern Cement Letters
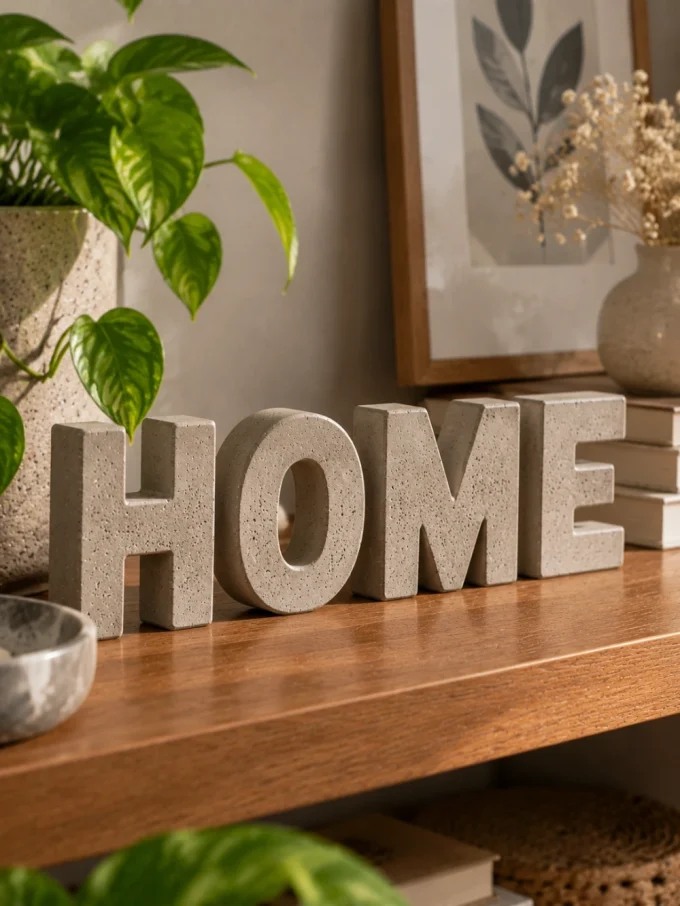
Cement letters can become decorative objects, initials, shelf accents, or personalized gifts.
Silicone alphabet molds are especially useful because they handle detailed shapes while allowing the cured material to be removed without destroying the mold.
You can create a single initial, a short word, or matching initials for a shelf or desk.
Keep the letters natural for a minimalist look, or lightly sand and paint them if you want more contrast.
Silicone molds are commonly used for small cement-letter casts because their flexibility makes demolding easier.
10. Turn Cement Into a Minimalist Soap Dish
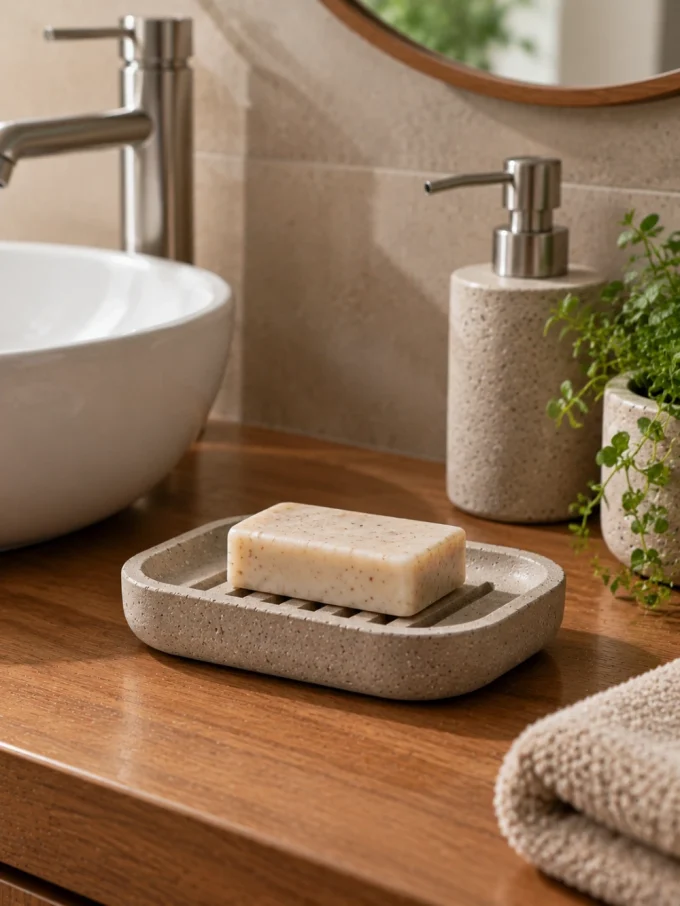
A small soap dish is a natural extension of the tray idea, but it needs more attention to water.
Create a shallow depression for the soap and, ideally, provide a way for excess water to drain rather than remain underneath the bar.
Use a bathroom-appropriate sealer if the particular product and application call for one.
Keep the form simple: an oval, rectangle, rounded square, or softly curved dish is enough.
This project can also work beautifully with a warm wood vanity or neutral stone bathroom.
For inspiration on combining natural materials in the bathroom, explore serene Japandi bathroom ideas.
11. Cast a Cement Ring Cone
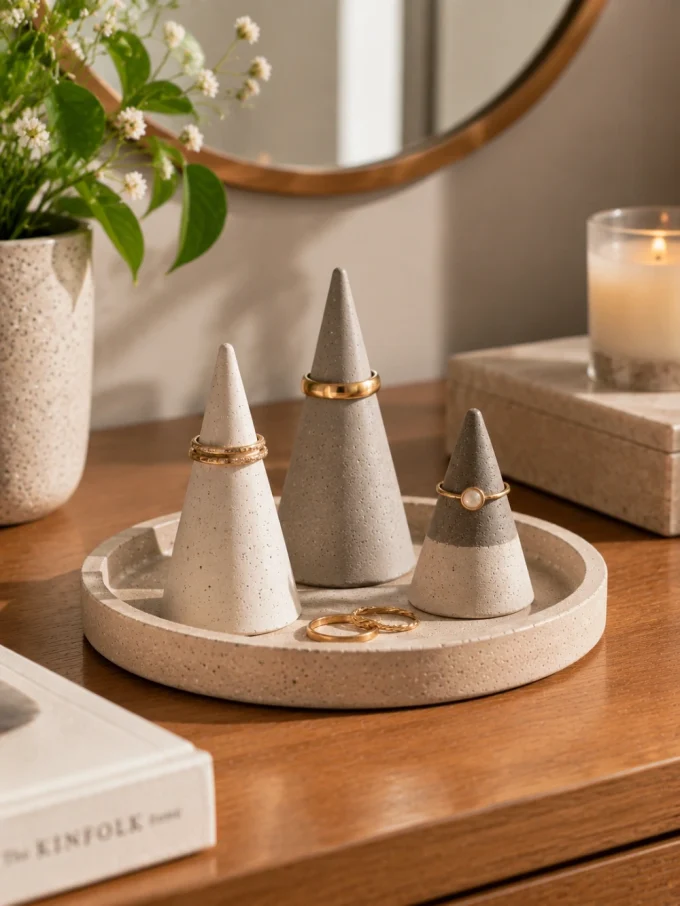
A small cone-shaped ring holder can be surprisingly elegant.
The idea is simple: create a narrow cone or tapered form with a stable base so rings can slide over the top.
Because the piece is small, you can experiment with different pigments and surface finishes without using much material.
Try a set of three in slightly different heights rather than one oversized object.
This is a good example of why cement crafts don’t need complicated molds. The silhouette itself creates the visual interest.
12. Create Textured Wall Tiles or Art Panels
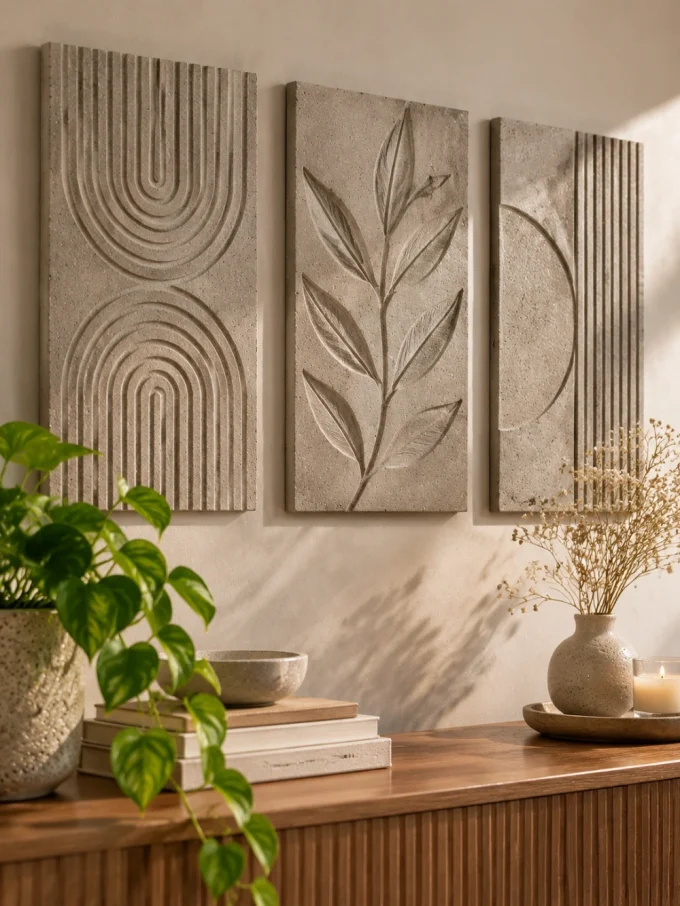
If you’re comfortable moving beyond tabletop decor, small cement panels can become wall art.
Use a shallow mold and introduce texture through raised lines, geometric grooves, leaves, fabric impressions, or abstract patterns.
Keep the panels relatively light and make sure the mounting system is appropriate for their weight and the wall surface.
For a minimalist interior, a group of three neutral panels can create a textured feature without introducing bright colors.
If you’re interested in broader ways to add dimension to walls, see DecoralCove’s wall texture design ideas.
13. Make a Cement Mini Pedestal
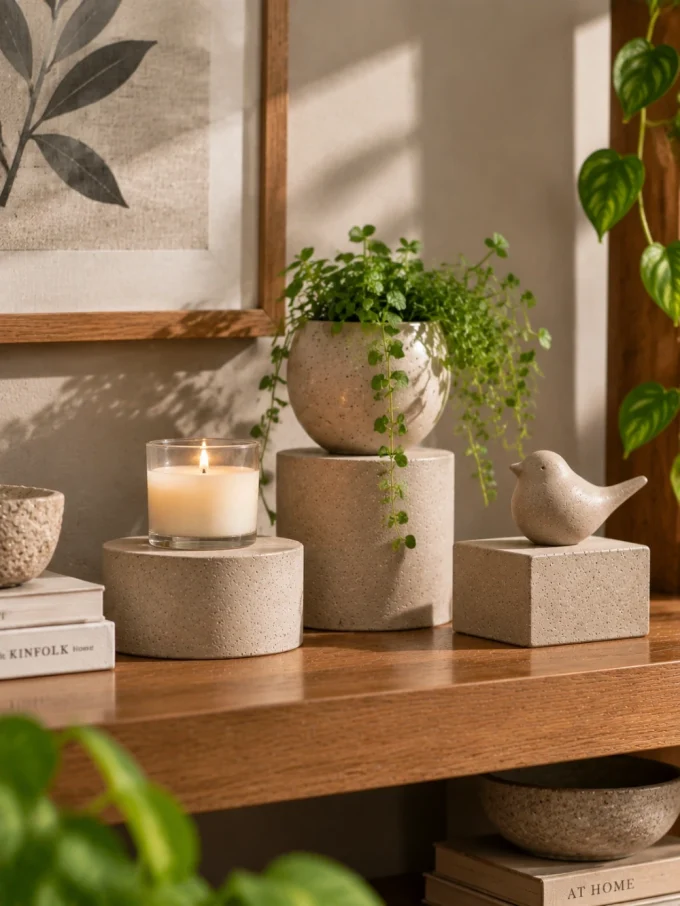
A small pedestal can elevate another decorative object and create different visual heights on a shelf or console.
Cast a short cylinder, cube, or rounded block and use it as a platform for a small plant, ceramic object, candle, or sculpture.
The trick is proportion.
A pedestal that is too tall becomes visually dominant. A low, broad form tends to look more like a styling accessory.
Several different heights can also be grouped together, but leave enough empty space around them so the arrangement doesn’t become cluttered.
14. Pour Organic-Shaped Cement Bowls
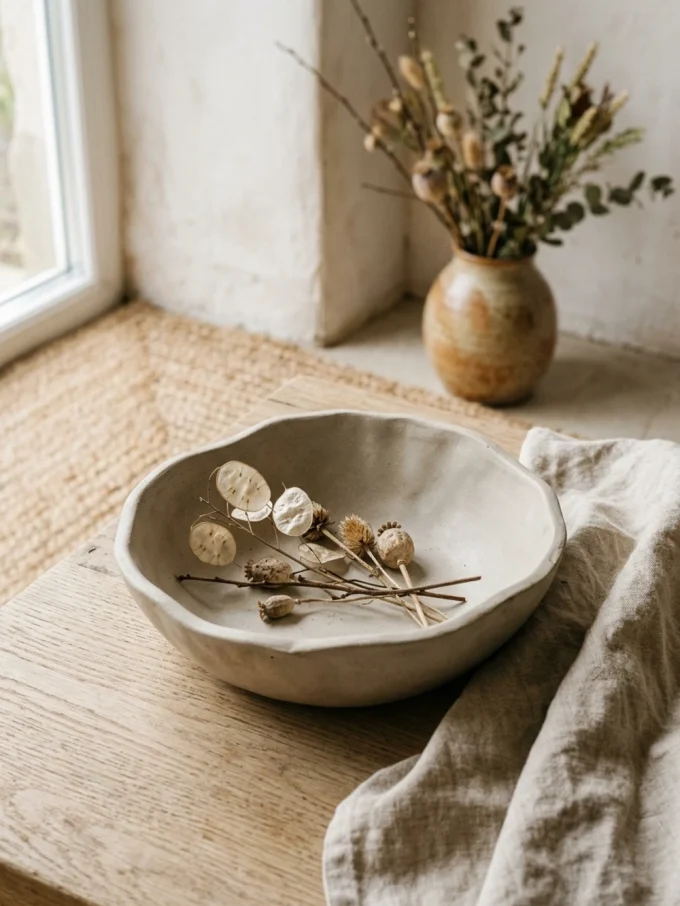
Move away from perfectly geometric molds by experimenting with organic silhouettes.
Think pebble shapes, irregular ovals, soft waves, or gently asymmetrical bowls.
These forms work especially well when you want cement to feel less industrial.
Pair an organic cement bowl with wood, linen, dried flowers, or woven accessories.
The contrast between the mineral surface and softer natural materials gives the piece warmth.
This approach also fits beautifully with earthy interiors, where restrained color and texture do more work than decorative patterns.
15. Create a Cement Doorstop
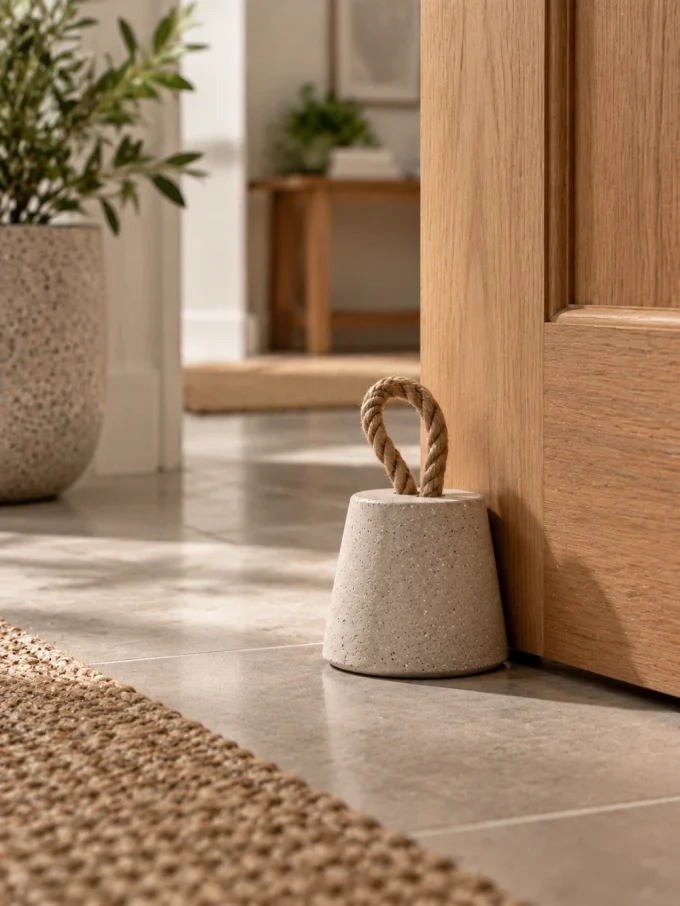
A doorstop is one of the rare decorative crafts where cement’s weight is an advantage.
Use a compact mold and create a shape with a flat, stable base.
You can add a rope loop or leather-style handle if the design allows it, making the object easier to move.
For a clean modern look, leave it unpainted and let the material provide the visual character.
Because the piece may be handled regularly, smooth sharp corners and make sure the finished object cannot easily tip over.
16. Make Small Cement Plant Markers
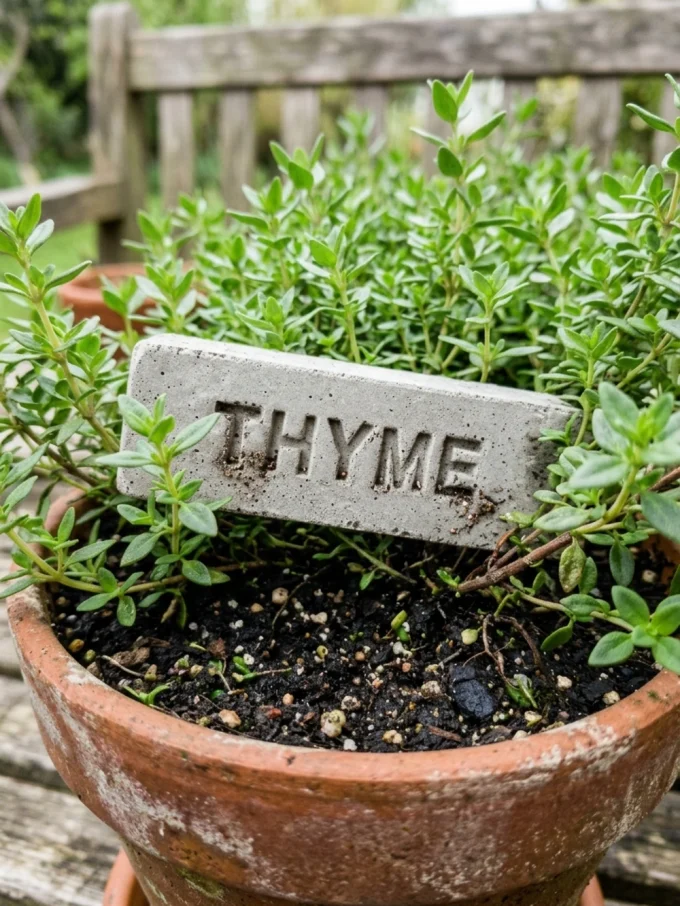
If you enjoy gardening, use cement to create reusable plant markers.
Cast small rectangular or rounded tags and add stamped letters while the material is still workable.
You can identify herbs, flowers, or indoor plants.
Keep the lettering simple and deep enough to remain visible after finishing.
These are especially useful as part of a larger handmade garden arrangement rather than as standalone home decor.
17. Cast a Minimalist Incense or Candle Tray
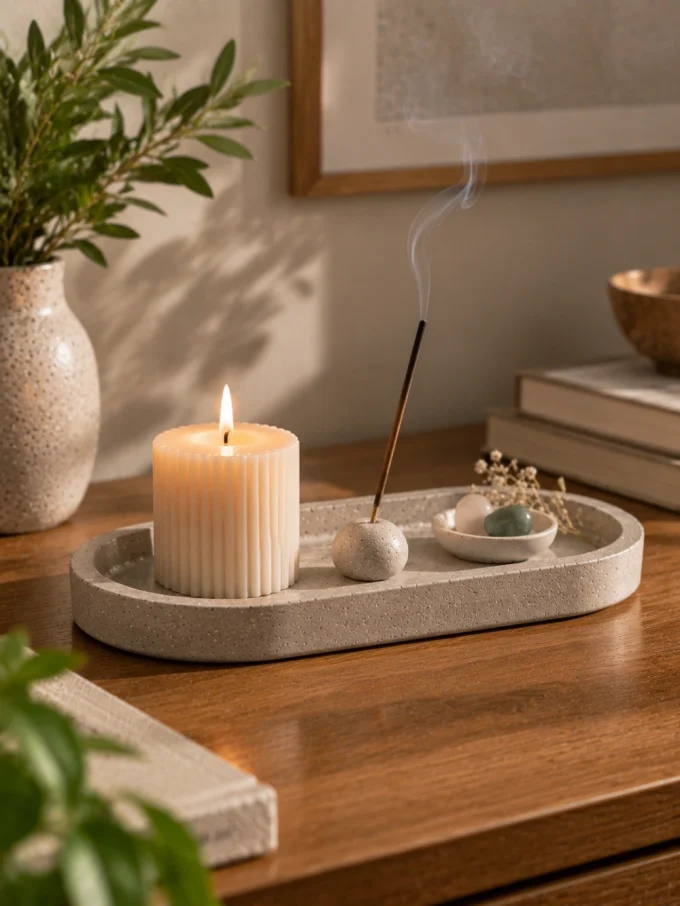
Instead of making a holder that contains the entire candle or incense object, create a larger tray that catches ash or wax.
This gives you more freedom with shape and styling.
A shallow oval or rectangular tray can hold one candle, a small incense holder, and a tiny stone or ceramic accessory.
The result becomes a small ritual area rather than just another decorative object.
Use a heat-appropriate setup and never leave burning candles unattended.
18. Create a Two-Tone Cement Decor Piece
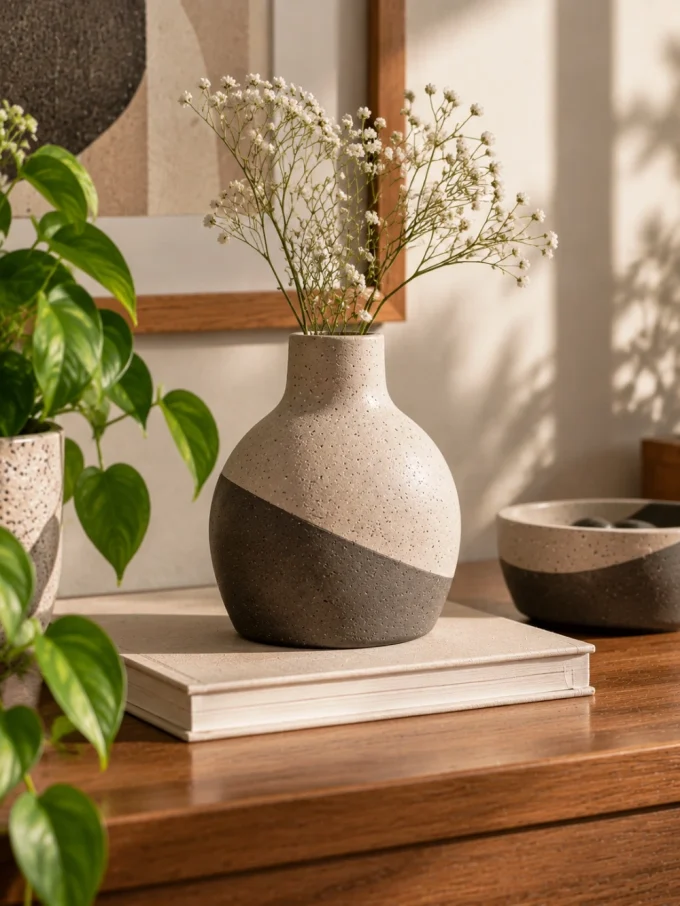
Color doesn’t have to mean bright paint.
You can create a sophisticated two-tone effect using closely related mineral colors such as warm gray and charcoal, beige and cream, or natural gray and muted terracotta.
Pour one color first and allow it to settle before introducing the second, depending on the effect you’re trying to achieve.
Alternatively, divide the mold into sections so the colors remain more clearly separated.
Test the combination on a small sample first. Cement and concrete pigments can behave differently depending on the material and concentration.
19. Make a Custom Cement Sculptural Object
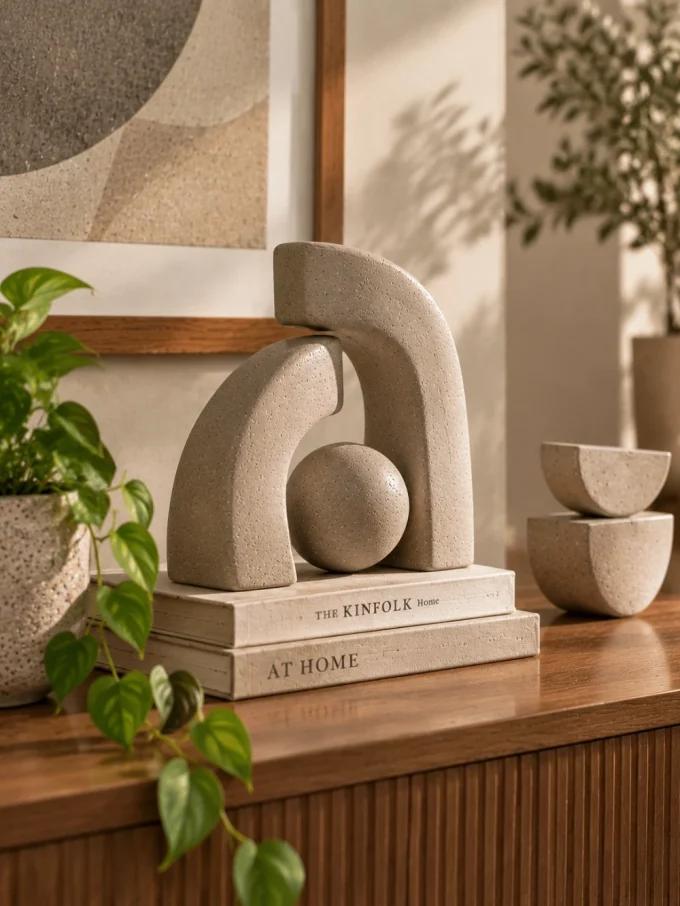
Once you understand the basic casting process, stop thinking only about traditional craft categories.
You can create abstract arches, stacked forms, half-moons, twisted shapes, small mountains, minimalist faces, or other sculptural objects.
The most successful pieces usually have a strong silhouette rather than lots of decoration.
Start with cardboard, foam, or another suitable temporary material to prototype the shape before committing to cement.
This is where DIY cement becomes particularly interesting: you are no longer simply reproducing a Pinterest craft. You’re designing an object that fits your own room.
The Material Matrix: Cement, Concrete, or Mortar?
Before making any of these DIY cement craft ideas, choose the material based on the object you’re actually making.
| MaterialBest UseMain AdvantageMain Limitation | |||
|---|---|---|---|
| Fine craft cement / fine casting mix | Small decor, trays, vessels, molds | Smoother small-scale finish | Usually costs more per pound |
| Standard concrete mix | Larger, chunky outdoor pieces | Strong and widely available | Coarse aggregate can create rough surfaces |
| Portland cement | Custom mixes | Gives you control over the recipe | Requires correct aggregate proportions |
| Mortar mix | Masonry-related applications and some textured projects | Fine compared with coarse concrete | Not automatically ideal for every decorative cast |
| Plaster or similar casting material | Indoor decorative objects | Smooth and easy to work with | Not a direct substitute for cement in wet or demanding applications |
The important distinction is that cement is an ingredient, while concrete is a mixture containing cement plus aggregates. QUIKRETE’s Portland cement information, for example, shows Portland cement being combined with sand and gravel to create concrete.
For small decorative pieces, look for a product specifically designed or well suited to fine casting rather than automatically reaching for the cheapest large bag of driveway concrete.
A coarse aggregate can make a planter or bookend perfectly usable, but it won’t give you the same smooth, detailed result as a fine-particle material.
The Consistency Test: Don’t Chase a Universal Water Ratio
One of the easiest ways to ruin a cement craft is adding too much water.
It is tempting to keep adding water until the mixture becomes very fluid because a runny mixture seems easier to pour.
That’s usually the wrong instinct.
Follow the specific product’s instructions first. Then look at the actual consistency rather than blindly adding more water.
For many small casting projects, you want something closer to thick pancake batter than watery soup.
It should flow into the mold when worked, but it shouldn’t behave like ordinary liquid.
QUIKRETE also warns that adding excessive water weakens concrete; its hand-mixing guidance describes a workable mixture that holds its shape when squeezed in a gloved hand.
The exact amount of water can vary with the product and conditions, so the visual consistency test is a useful practical check alongside the manufacturer’s instructions.
Mold Selection: What Works and What Can Go Wrong
Your mold determines the final shape, but it also determines how difficult the finished piece will be to remove.
Silicone is the easiest choice for detailed shapes
Flexible silicone can bend away from the cured piece, making it particularly useful for letters, small bowls, candle holders, and textured designs.
Cardboard can work for simple geometric forms
A temporary cardboard mold can be inexpensive and useful for bookends, blocks, panels, and simple trays.
It is also disposable, which means you don’t have to fight a rigid container during demolding.
Rigid containers need more planning
Glass and hard plastic containers can work for some projects, but they can become difficult to release when the cast has cured and contracted slightly.
Don’t choose a mold only because it has the perfect shape.
Ask a more important question:
How will I get the finished object out?
That single question can save an entire project.
DIY casting guides commonly use silicone or disposable molds and recommend gentle demolding rather than forcing the cured object out.
The Perfect Pour: Mix, Fill, Vibrate, and Cure
Once the material and mold are ready, the actual casting process becomes much simpler.
1. Protect your work surface
Cover the area before mixing. Cement dust and wet slurry can be difficult to remove once they dry.
Use dedicated mixing containers and tools rather than household items you still need for food preparation.
2. Add water according to the product instructions
Don’t pour in all the water automatically.
Mix gradually and judge the consistency.
3. Fill the mold in manageable amounts
For deeper molds, add material gradually rather than dumping everything in at once.
Use a stick or tool to work the mixture into corners.
4. Tap the mold
Gently tapping and vibrating the mold helps the material settle and can release trapped air bubbles.
You don’t need industrial equipment for small projects. A controlled tapping motion against a protected work surface is often enough.
Craft casting instructions commonly recommend tapping or vibrating molds to help settle the mix and reduce unwanted air pockets.
5. Leave it alone
Don’t keep opening the mold to check the project every few minutes.
Allow the material to set and cure according to the product’s instructions.
Curing time varies by material, thickness, temperature, humidity, and product formulation, so there is no single universal waiting period that applies to every cement craft.
Finishing the Piece: Sanding, Sealing, and Protecting Furniture
A cast isn’t necessarily finished when it comes out of the mold.
Sanding can transform the appearance.
Start by removing obvious sharp edges or rough spots rather than aggressively polishing the entire object. The goal is usually to create a clean handmade finish, not to erase every trace of the casting process.
For planters, trays, or other pieces exposed to moisture, consider an appropriate sealer based on the intended use and compatibility with the material.
Most importantly, protect whatever surface the cement object will sit on.
Add:
- Cork
- Felt
- Silicone bumpers
- Rubber feet
This is especially important for trays, bookends, planters, and sculptures placed on wood or painted furniture.
A beautiful cement object that quietly scratches your dining table is not a successful DIY.
The Plumbing Warning: Never Wash Cement Down the Sink
This is one of the most important cleanup rules in the entire project.
Do not rinse cement or cement slurry down your household sink.
Residual cement can settle inside plumbing and harden. Instead, let leftover material settle or cure in a disposable container where appropriate, then dispose of the hardened residue according to local waste rules.
For tools, remove as much material as possible before cleaning them.
A few extra minutes spent cleaning outside or in a controlled container is much better than turning a small craft project into a plumbing repair.
Safety First: Treat Dry Cement as a Dusty Material
Small projects still deserve proper precautions.
When handling dry cement-based powders:
- Work in a well-ventilated area.
- Avoid creating unnecessary dust.
- Wear appropriate eye protection.
- Use waterproof gloves when handling wet cement.
- Follow the safety instructions on the product’s packaging or Safety Data Sheet.
- Use appropriate respiratory protection when the product instructions call for it.
- Keep powders away from children, pets, food, and food-preparation areas.
QUIKRETE specifically advises eye protection and waterproof gloves when working with cement-based products.
Don’t treat cement powder like ordinary craft flour. A clean, protected workspace is part of the project.
How to Make DIY Cement Crafts Look Expensive
The difference between an attractive cement craft and one that looks like a school project usually comes down to restraint.
Keep the color palette limited
Natural gray, warm white, charcoal, sand, and muted earth tones tend to look more sophisticated than several bright colors competing together.
Focus on silhouette
A strong arch, oval, cylinder, or geometric form can carry the entire design.
Sand the edges
Clean edges immediately make small casts feel more finished.
Repeat a material
Pair cement with oak, linen, stone, glass, or ceramics instead of introducing a different material for every object.
Avoid overdecorating
One sculptural cement vase can have more impact than five small cement ornaments scattered across a shelf.
If you’re building a larger home styling scheme around handmade pieces, DecoralCove’s best home decor tips can help with the bigger-picture arrangement.
Budget vs. Quality: Where to Spend Your Money
Cheap materials are not always the cheapest solution.
A large inexpensive bag of coarse concrete might appear to offer better value, but if you’re making small objects and constantly fighting gravel, rough surfaces, or unsuitable molds, some of that material is effectively wasted.
A smaller quantity of a finer casting material can make more sense when:
- The project is small.
- Surface smoothness matters.
- The mold contains details.
- You plan to sand the finished piece.
- You want thinner decorative objects.
On the other hand, standard concrete can make sense for chunky planters, heavy outdoor pieces, or projects where a rougher appearance is intentional.
The best material is therefore not the cheapest one.
It is the one that matches the scale and finish of your project.
Common DIY Cement Craft Mistakes to Avoid
Using the wrong material
A coarse concrete mix can make detailed small casts frustrating.
Better approach: choose a fine casting material when smooth detail is the priority.
Adding too much water
A thinner mixture may seem easier to pour but can compromise the finished result.
Better approach: follow the product’s water instructions and aim for a workable, thick consistency.
Choosing a mold without considering demolding
A beautiful rigid mold is useless if you can’t remove the finished cast.
Better approach: think about the release path before you pour.
Skipping vibration
Air trapped against the mold can leave holes and uneven areas.
Better approach: gently tap and vibrate the mold after filling.
Demolding too aggressively
Forcing the object out can chip corners or break thin sections.
Better approach: allow the material to set properly and flex the mold where possible.
Leaving the underside unfinished
The top may look perfect while the bottom scratches furniture.
Better approach: sand rough areas and add protective pads.
Treating porous cement like waterproof plastic
Cement-based materials can absorb moisture.
Better approach: use an appropriate sealer where needed and design drainage into moisture-exposed projects.
Cleaning everything in the sink
This can create a much bigger problem than the craft itself.
Better approach: keep cement residue out of household plumbing.
For more general decorating mistakes that can affect the finished look of your home, see DecoralCove’s home decor mistakes to avoid.
Which DIY Cement Craft Should You Make First?
If you’re completely new to cement crafts, don’t begin with a complicated sculptural planter or large wall panel.
Start with something forgiving.
Best beginner project
Cement catchall tray
It uses a simple mold, has relatively few details, and gives you an immediate opportunity to practice mixing, filling, curing, sanding, and protecting the underside.
Best functional project
Cement bookends
They are heavy by design, so minor imperfections are less noticeable.
Best gift project
Cement candle holders or jewelry dishes
They are small, customizable, and easy to make in batches.
Best design-focused project
Textured wall panel
Choose this once you’re comfortable with casting and want to experiment with surface design.
Best nature-inspired project
Small cement planter
It pairs the hard, mineral quality of cement with the softness of plants.
FAQs About DIY Cement Craft Ideas
Is cement the same as concrete?
No. Cement is a binding ingredient used in concrete. Concrete typically combines cement with aggregates such as sand and gravel or stone. QUIKRETE’s product information illustrates this distinction directly.
Can I use regular concrete mix for crafts?
You can use some regular concrete mixes for decorative projects, especially larger or intentionally rough pieces. However, coarse aggregate can make small, detailed objects difficult to cast and finish smoothly.
For small indoor decor, a finer casting material is often easier to work with.
What is the easiest DIY cement craft for beginners?
A shallow tray, coaster, simple bookend, or small planter is a good starting point because the shapes are relatively straightforward and the finishing requirements are manageable.
Why did my cement craft crack?
Possible causes include an unsuitable mix, excessive water, insufficient support, premature demolding, uneven drying, or a mold that restricts the cast in an unfavorable way.
Check the product instructions and review the entire process rather than assuming the mold alone caused the problem.
Do cement crafts need to be sealed?
Not every decorative piece requires the same finish. Sealing can be useful for pieces exposed to moisture, staining, or regular handling, but the correct product depends on the material and intended use.
Always check compatibility before applying a sealer.
Can I make cement crafts without silicone molds?
Yes. Simple cardboard, plastic, or other suitable molds can work depending on the shape and release requirements.
Silicone is especially useful when the mold contains detail or when easy demolding is important.
How do I stop cement crafts from scratching furniture?
Sand rough areas on the underside and attach cork, felt, silicone, or rubber protective pads.
This should be considered part of the finishing process, not an optional decoration.
Final Thoughts
The appeal of DIY cement crafts is not simply that cement is inexpensive or easy to find.
It is the contrast.
A small cement tray can make a wooden table feel more grounded. A sculptural planter can give greenery a stronger presence. A simple bookend can add architectural weight to an otherwise ordinary shelf.
But good results come from treating cement like a real craft material rather than something you simply mix and pour.
Choose the right material for the scale of the project. Use a mold you can actually release. Control the water instead of flooding the mix. Tap out trapped air. Give the piece enough time to cure. Finish the edges. Protect your furniture. And keep cement residue away from your household plumbing.
Once you understand those basics, you can move beyond copying individual projects and start designing your own.
That’s where DIY cement crafts become much more interesting: the material stops being the idea, and your shape, texture, and function become the design.