

Macrame wall hangings are one of those DIY projects that can look far more complicated than they actually are. A finished piece may contain layers of knots, long fringe, geometric shapes, beads, and textured fibers, but many successful designs are built from only a few basic techniques repeated with consistency.
The real difference between a wall hanging that looks intentional and one that feels unfinished usually comes down to scale, knot tension, spacing, cord choice, and the overall silhouette. A small piece can fill an awkward wall beside a desk, while a wider design can become the main decorative feature above a sofa or bed.
The ideas below cover simple beginner projects, geometric patterns, natural branch designs, colorful pieces, layered textures, and larger statement hangings. Some can be completed with only a handful of knots, while others are better suited to someone ready to experiment with more detailed fiber work.
What You Need Before Making a Macrame Wall Hanging
Most DIY macrame wall hangings begin with a surprisingly small group of materials. Macrame cord, sharp scissors, measuring tape, and some type of support are usually enough for a basic project. A smooth wooden dowel creates a clean, structured finish, while a natural branch immediately gives the piece a more relaxed and organic character.
Cotton cord is commonly used because it is easy to knot and can often be separated or brushed into soft fringe. Cord thickness changes the visual weight of the entire project: thicker cord produces larger, more obvious knots, while finer cord allows more detailed patterns.
Optional materials such as wooden beads, hoops, colored fibers, tassels, or woven yarn can be added later. If this is your first project, start with fewer materials. It is easier to understand the structure of the design when you are not trying to manage several decorative elements at once.
Basic Macrame Knots Worth Learning First
You do not need to memorize dozens of knots before making your first wall hanging. A small number of foundational techniques can be combined into a surprisingly wide range of patterns.
Lark’s Head Knot
The Lark’s Head Knot is commonly used to attach cord to the support. It creates a clean starting point and allows multiple strands to hang evenly from a dowel, branch, or hoop.
Learning to attach cords consistently matters because uneven spacing at the top tends to affect everything built underneath it.
Square Knot
The Square Knot is one of the most useful decorative knots in macrame. It can be repeated in straight rows, staggered into alternating patterns, or used inside larger diamonds and geometric shapes.
Beginners benefit from practicing several rows because the knot quickly reveals whether their tension is consistent.
Half Knot
Repeated Half Knots naturally twist into a spiral. That makes them useful when you want to introduce movement between straighter sections.
A few spiral sections can add variety without requiring an entirely new design language.
Double Half Hitch Knot
The Double Half Hitch is particularly useful for creating diagonal and curved lines. It is often the knot that gives diamond, chevron, and geometric patterns their stronger directional structure.
Practice controlling both the angle and tension before using it across a large wall hanging.
25 DIY Macrame Wall Hanging Ideas
1. Start With a Simple Square-Knot Wall Hanging
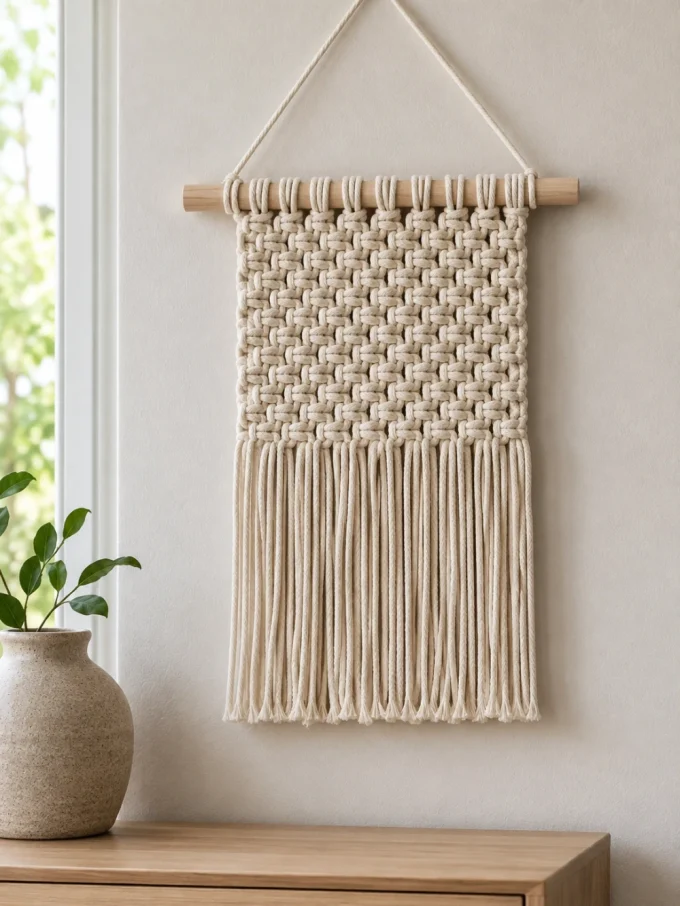
The easiest first macrame project is often one that allows a single knot to do most of the work. Attach several strands of cotton cord to a short wooden dowel and use repeated Square Knots to create a compact panel before allowing the remaining cord to fall naturally into fringe.
The simplicity gives you space to focus on consistency rather than constantly checking a complicated pattern. If one row is pulled tighter than another, the lower section may begin to narrow or curve, so compare your knots as you work rather than correcting everything at the end.
A neutral cord keeps the structure easy to read. Once the basic version feels comfortable, the same layout can be expanded with alternating Square Knots, a V-shaped bottom, or a small central bead.
2. Make a Small Hanging for an Empty Wall Corner
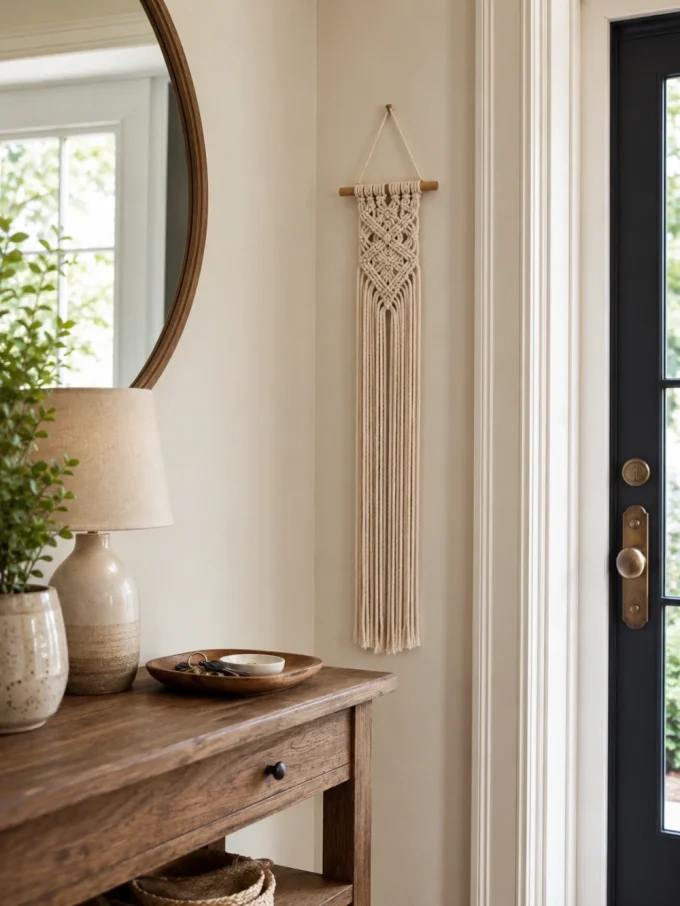
Not every wall needs a large statement piece. Narrow spaces beside a bookshelf, doorway, mirror, or desk often benefit more from a compact hanging that introduces texture without dominating the surrounding furniture.
Use a short dowel and keep the knotted section relatively narrow. Long vertical cords underneath can make the piece appear taller while preserving its small footprint. This works particularly well when the available wall is narrow but has enough height to accommodate fringe.
A small macrame hanging can also sit comfortably above or beside an entryway console table where a larger textile might compete with lamps, trays, mirrors, or other objects already occupying the space.
3. Use a Natural Branch Instead of a Wooden Dowel
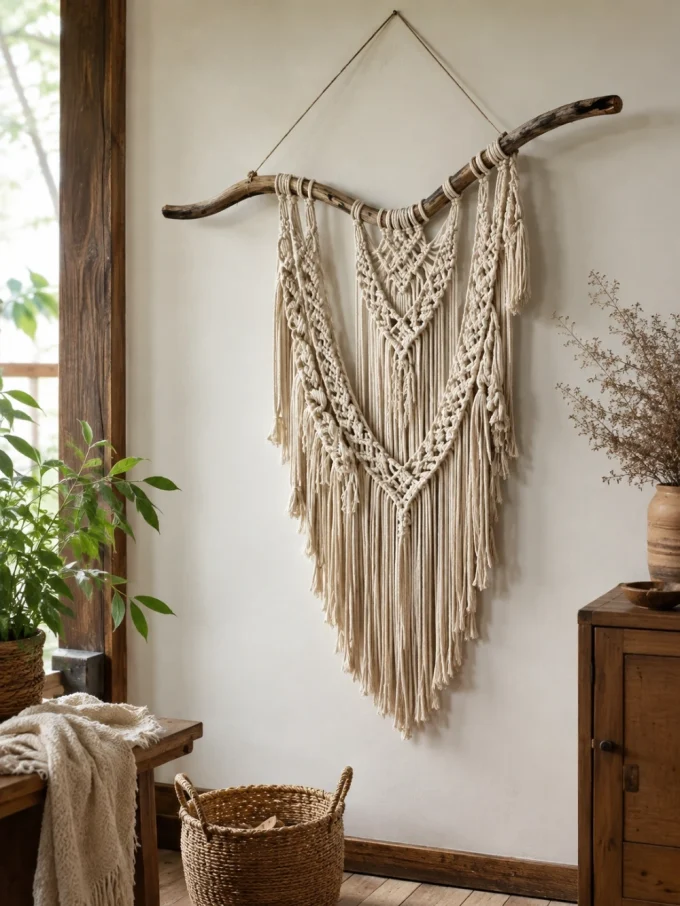
A natural branch changes the wall hanging before any decorative knotting begins. Unlike a perfectly straight dowel, the branch introduces irregularity, texture, and movement at the top of the piece, which makes the finished hanging feel more collected and less manufactured.
This support works particularly well with warm-white or beige cord because the wood remains visually distinct from the fibers. Instead of forcing the knot pattern into perfect symmetry, allow the cords to respond to the branch’s natural shape. One side can contain a slightly longer section or denser knotting without feeling unbalanced.
Choose a branch that is clean, dry, and sturdy. Loose bark or fragile sections should be removed before attaching cord. The result pairs naturally with wood, baskets, plants, and other textured home decor items.
4. Build a Geometric Diamond Pattern
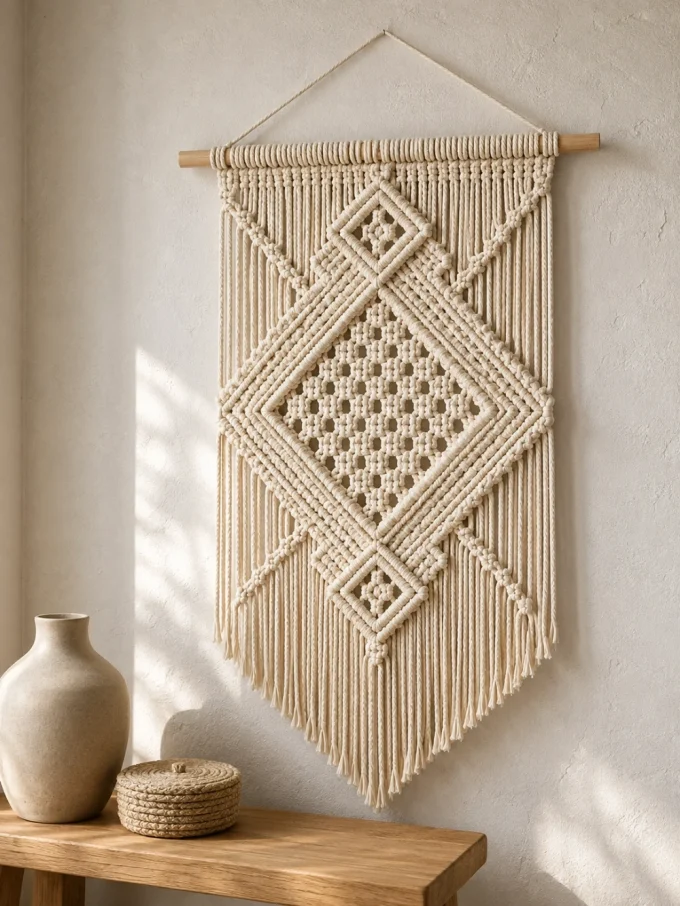
Diamond patterns are effective because they create a clear focal structure even when the entire wall hanging uses only one cord color. Diagonal Double Half Hitch lines can form the outside edges, while Square Knots, open space, or smaller repeating shapes can be used inside the diamond.
The important part is not adding more knots but keeping the geometry consistent. If one side is tied more tightly than the other, the diamond begins to tilt or collapse inward. Check the left and right edges after each major section instead of waiting until the entire shape is complete.
A single large diamond works well in a small hanging, while repeated diamonds can create a stronger rhythm in a larger piece. Neutral cord is especially effective because shadows naturally emphasize the raised lines created by the knots.
5. Let Long Fringe Become Part of the Composition
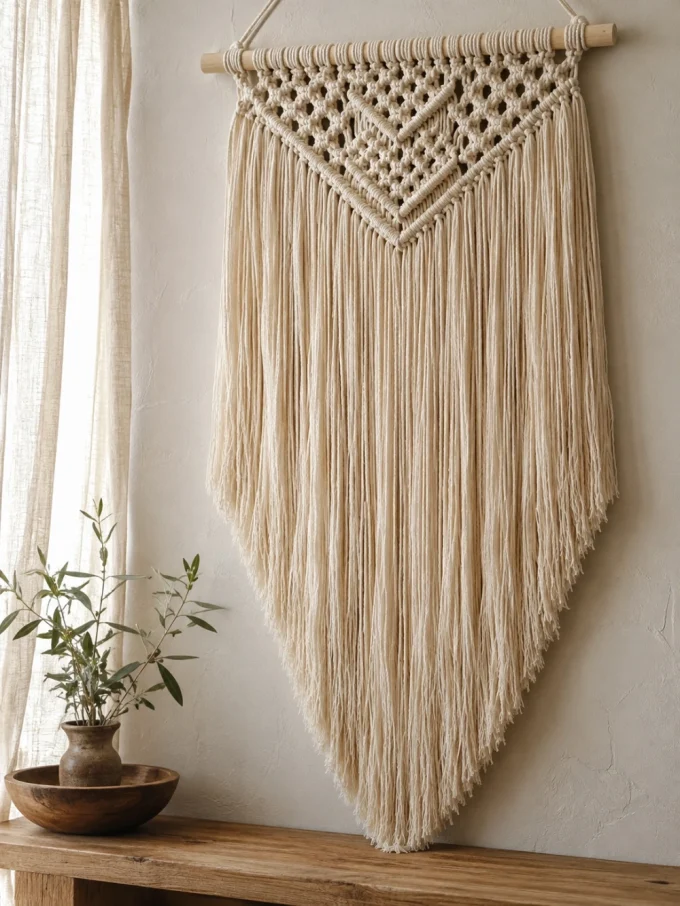
Fringe should not be treated simply as the unused cord left after knotting. The length, thickness, and shape of the fringe can become one of the strongest features in the finished wall hanging.
A relatively compact knotted section followed by long, brushed fibers creates a useful contrast between structure and softness. The fringe can be cut straight, into a shallow curve, a deep V, or an asymmetrical line depending on the overall silhouette you want.
Brush or separate the fibers before making the final trim because fringe often sits differently once the cord has relaxed. Remove small amounts gradually. Cutting several inches immediately may create an uneven edge that can only be corrected by shortening the entire piece.
6. Try an Asymmetrical Macrame Design
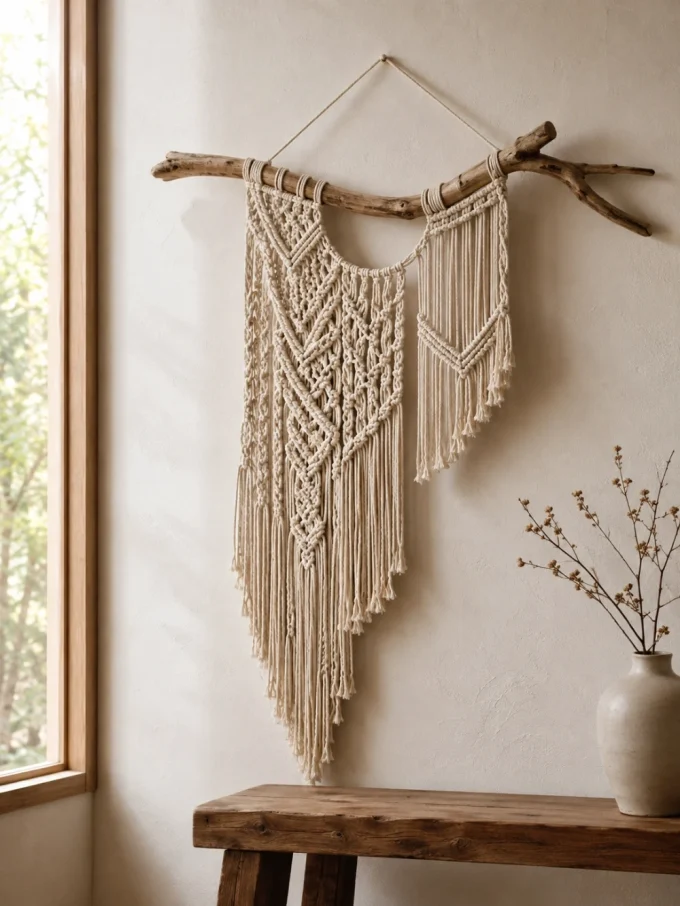
Symmetry is common in macrame because repeated knots naturally produce mirrored patterns, but an asymmetrical design can look more relaxed and contemporary. Instead of giving both sides equal visual weight, allow one area to contain more knotting, longer fringe, or a more pronounced decorative detail.
The approach works particularly well on irregular branches, where a perfectly symmetrical design can sometimes feel disconnected from the support. Let the natural shape of the branch help determine where the heavier section sits.
Asymmetry still needs visual control. Repeat the same cord color, knot family, or texture across both sides so the design remains connected. Without that relationship, the hanging can look unfinished rather than intentionally uneven.
7. Keep the Design Minimal With More Open Space
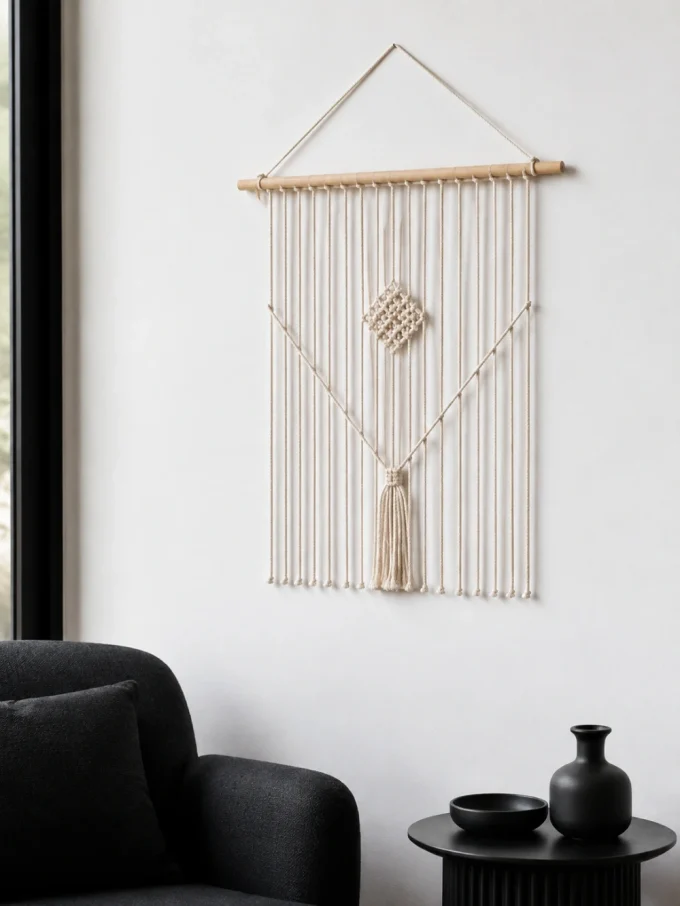
Minimal macrame relies heavily on negative space. Instead of filling the entire area beneath the dowel with dense knotting, allow sections of loose cord and visible wall to become part of the composition.
Use one or two knot types and keep the overall silhouette simple. A few diagonal lines, a compact central pattern, and restrained fringe can often create more impact than a heavily decorated piece, especially in rooms where the surrounding furniture already has strong shapes.
Because there are fewer elements, mistakes become easier to notice. Spacing, knot tension, and trimming need to be considered carefully. A cream or natural hanging can look particularly effective in a small black and white living room where the fibers soften the contrast without adding another dominant color.
8. Add Wooden Beads Between Knotted Sections
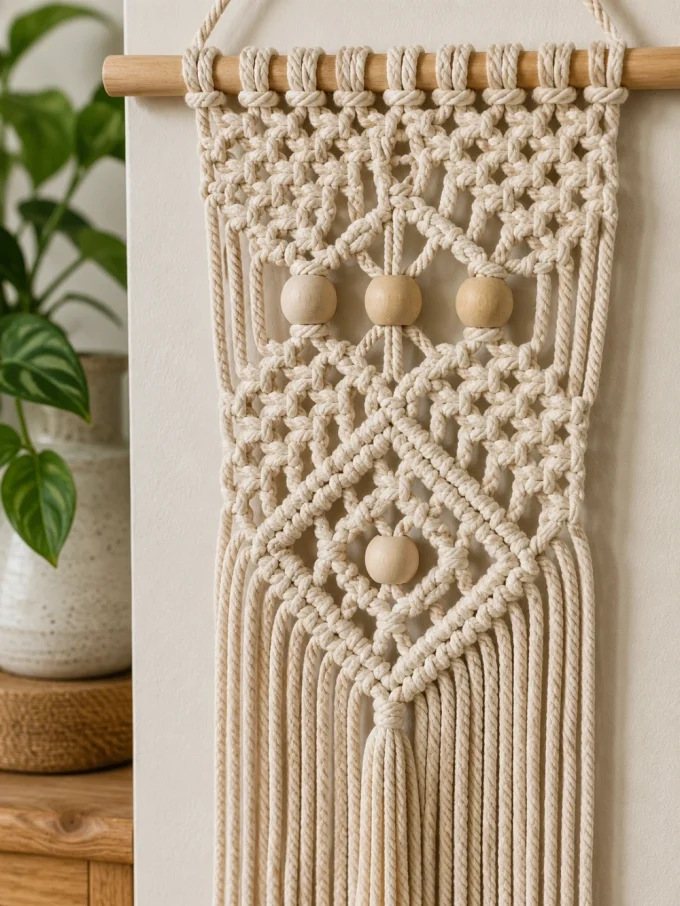
Wooden beads introduce another texture without changing the handmade character of the macrame. They work best when they interrupt the knot pattern rather than covering every available strand.
A small group of beads can sit between two rows of Square Knots, inside the center of a diamond, or immediately above the fringe. Repetition helps: three matching beads placed across a central section usually feel more deliberate than several unrelated beads scattered throughout the piece.
Check the bead openings before finalizing your cord. Thick cotton strands may not fit through smaller holes, particularly when multiple cords need to pass through the same bead.
Natural unfinished wood keeps the palette quiet, while painted beads can provide a controlled way to introduce color without replacing the neutral cord.
9. Create Macrame Leaves or Feathers
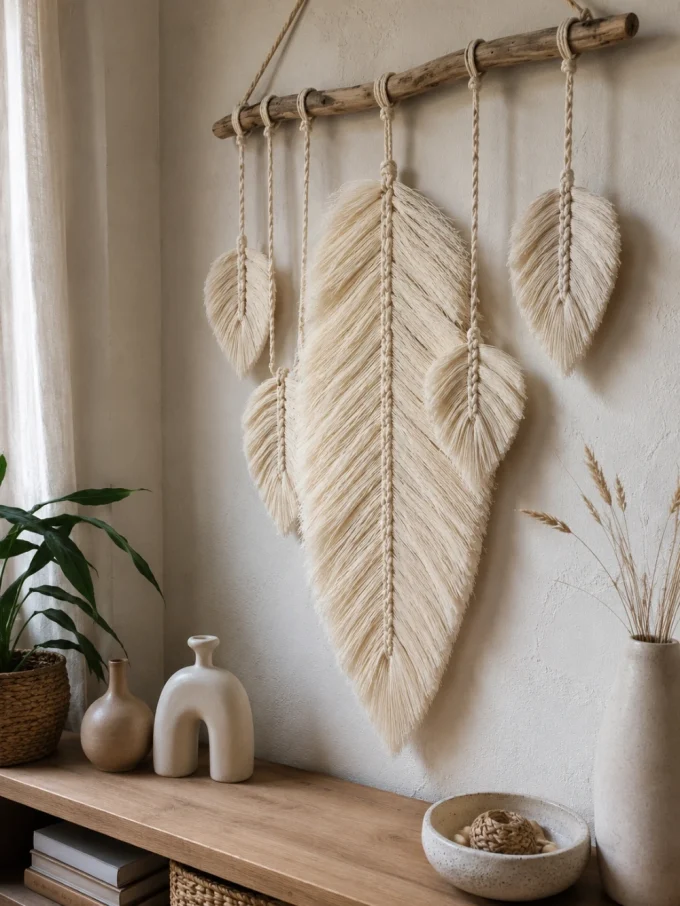
Macrame leaves and feathers are useful when you want softer organic shapes rather than another geometric panel. They are usually created by attaching shorter fibers around a central cord, separating or brushing those fibers, and trimming the final outline.
A single large feather can become the focal point of a compact wall hanging. Several smaller leaves can also be suspended at different heights to create a more layered arrangement.
The final shape depends heavily on trimming. Work on both sides gradually and step back regularly rather than trying to perfect one edge before touching the other.
This type of project is also useful for people who enjoy experimenting with handmade decorative objects. It can pair naturally with other craft-based pieces such as air-dry clay decor without making the room feel overly coordinated.
10. Introduce a Two-Color Palette
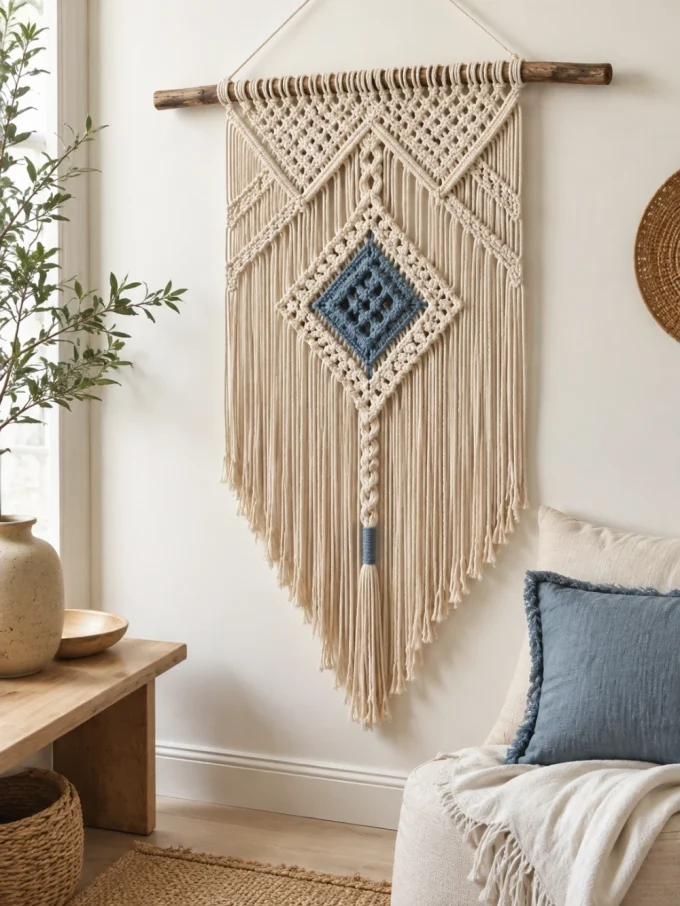
Using two colors can make knot patterns easier to read while keeping the finished wall hanging cohesive. The simplest approach is to choose one dominant neutral and use the second shade only in selected areas.
Cream paired with terracotta creates warmth, while beige and muted olive feel more organic. White with charcoal produces stronger contrast, and ivory with a dusty blue can create a softer color transition.
Use the second shade intentionally. A colored central diamond, one row of knots, or a limited group of cords usually feels more considered than alternating colors randomly across the entire piece.
Think about the wall behind the hanging too. A blue accent cord, for example, behaves differently against warm white than it does against the shades explored in cool blue paint ideas.
11. Make the Fringe Ombre or Dip-Dyed
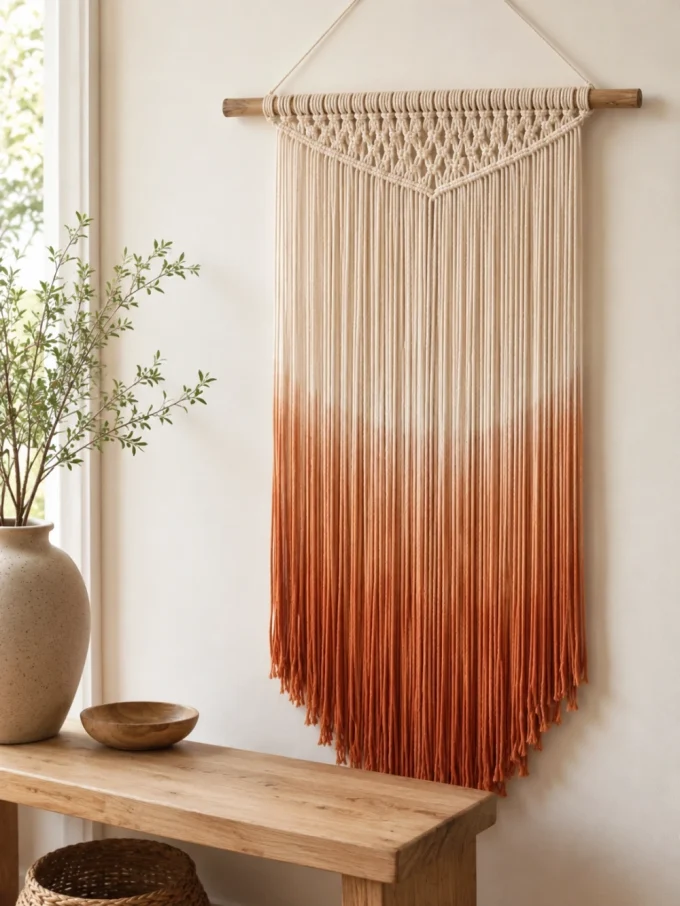
Color can become the focal point even when the knotting itself remains simple. An ombre or dip-dyed lower section allows the upper part of the hanging to stay neutral while the fringe gradually introduces another shade.
Long fringe works especially well because the uninterrupted fibers give the gradient enough room to be visible. A short fringe may not show the transition clearly.
Keep the rest of the design restrained. If the hanging already includes several knot patterns, beads, multiple cord colors, and an unusual support, the dyed section may become one decorative element too many.
Plan the final fringe length before finishing the color treatment. Significant trimming afterward could remove the part of the gradient that gives the design its strongest contrast.
12. Make a Wide Hanging for Above a Sofa or Bed
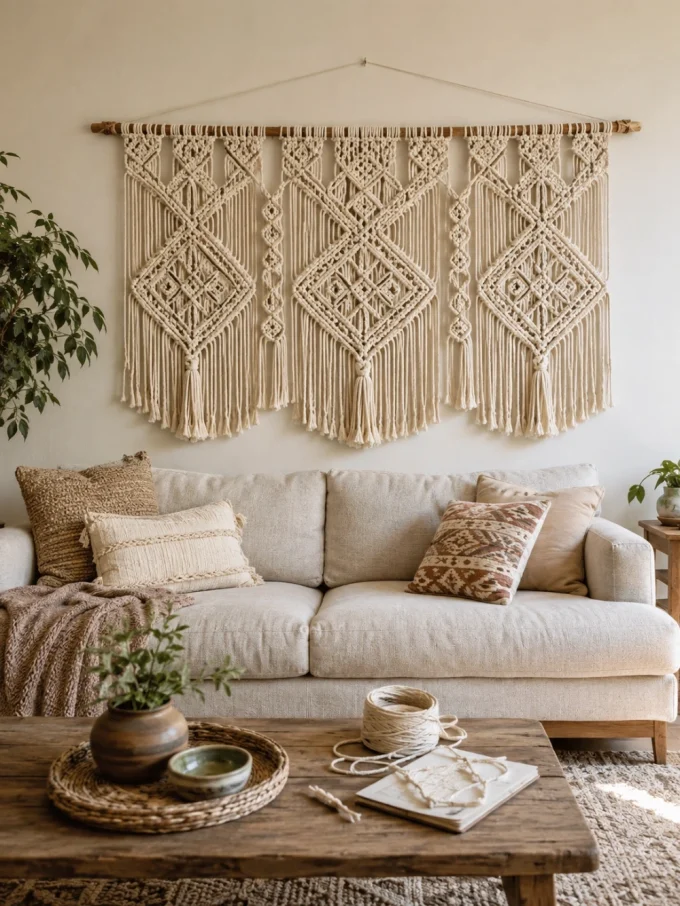
Large furniture creates a broad visual base, so a very narrow macrame piece may feel disconnected when placed above it. A wider hanging creates a stronger relationship with a sofa, bed, long bench, or console.
Instead of filling the entire width with different techniques, divide the design into repeating zones. Several related diamond patterns or mirrored knot sections can create enough visual weight without turning the piece into one solid block.
The larger size also increases the practical demands of the project. More width means more strands, and knot-heavy designs consume substantially more cord than loose vertical sections.
Sketch the basic pattern before cutting. Planning where the densest sections and open spaces will sit is much easier than trying to create balance after dozens of strands are already attached.
13. Create a Long, Narrow Vertical Hanging
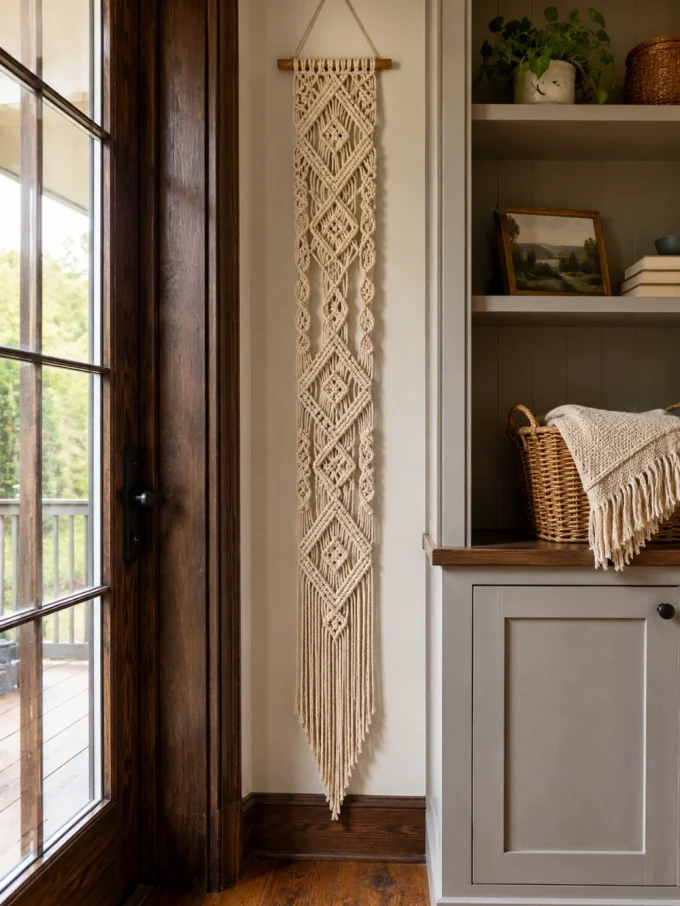
Some of the most difficult walls to decorate are tall, narrow spaces between doors, windows, shelves, and cabinets. A vertical macrame hanging can fill that gap without requiring the width of traditional wall art.
Start with a relatively short support and build the design downward. Repeated diamonds, spirals, alternating Square Knots, or long fringe can emphasize height and draw the eye vertically.
Avoid making the upper section so narrow that the entire piece begins to resemble a single cord. Establish enough width near the support to make it read as intentional wall decor, then taper the design gradually if you want a narrower lower section.
This shape can be particularly effective in hallways where wall width is limited. For more ideas on handling long transitional spaces, see these hallway ideas.
14. Layer Different Fibers and Textures
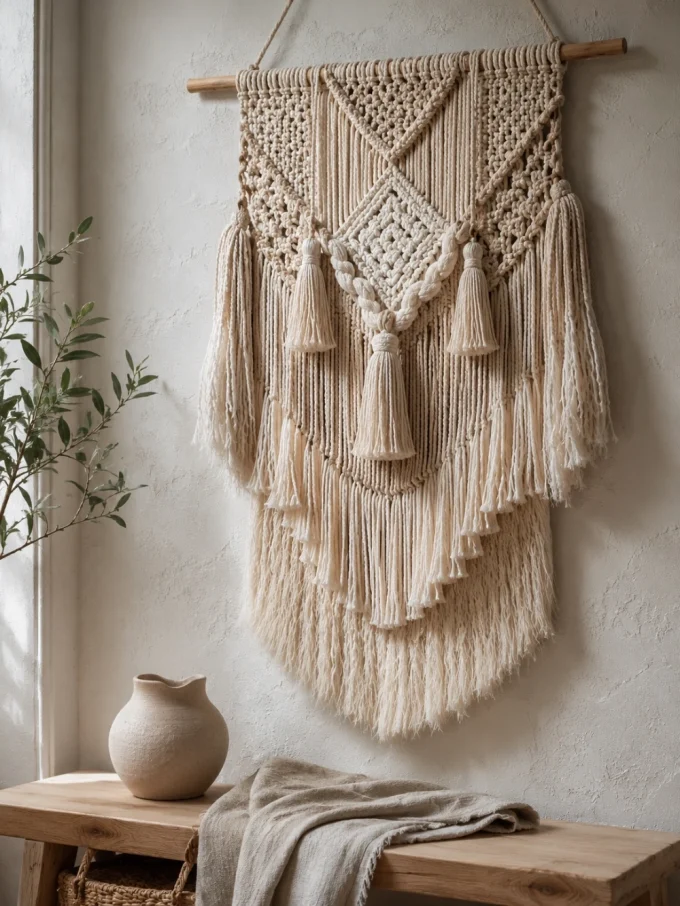
A macrame hanging can contain many knots and still appear visually flat if every part has the same thickness and surface. Introducing differences in texture creates depth that is noticeable even from across the room.
Combine tightly knotted cotton with looser cord, soft brushed fringe, tassels, or a small amount of thicker fiber. Some areas can remain structured while others become softer and more irregular.
Choose one texture to dominate. If thick yarn, brushed fringe, tassels, and heavily twisted cord all compete equally, the design can lose its hierarchy.
The principle is similar to using physical texture elsewhere in a room. A layered fiber piece can complement dimensional treatments such as wall texture design ideas without needing to match the wall itself.
15. Combine Macrame With Simple Weaving
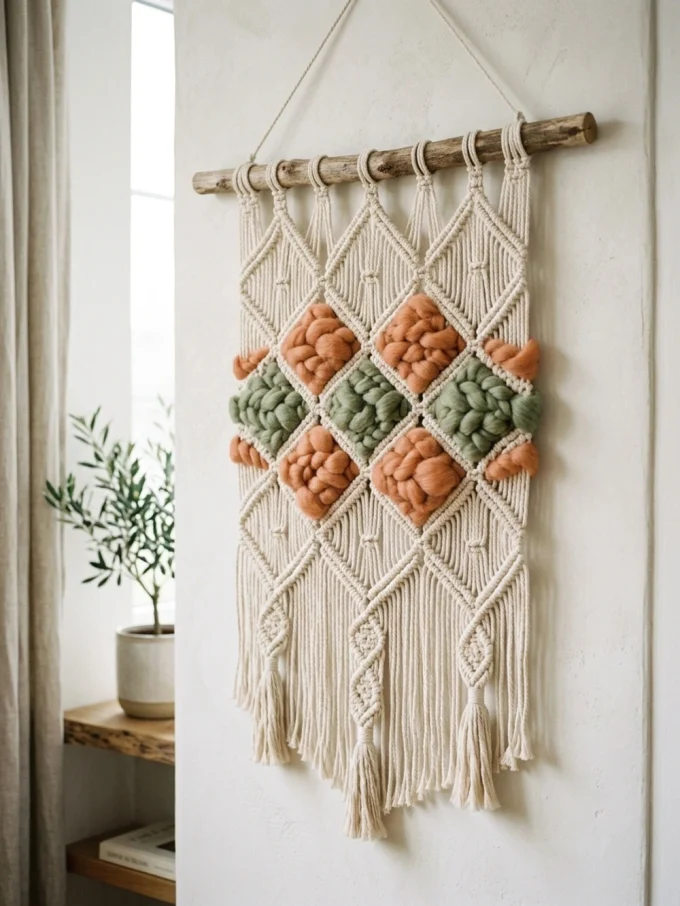
A macrame-and-weaving combination produces a more textile-like piece than traditional knotting alone. Start with the macrame structure, then introduce thicker yarn or another fiber through selected openings.
The woven area can bring in color, softness, and volume while the knots continue to provide structure. This works particularly well inside large open diamonds or between rows of simpler knots.
The design becomes harder to control when both techniques are equally detailed. Decide which one is responsible for the main visual pattern. Let macrame establish the framework and use the woven sections as accents, or reverse that relationship intentionally.
This is better suited to someone who is already comfortable with basic knot tension because managing two fiber techniques at the same time adds another level of complexity.
16. Use a Wooden Hoop Instead of a Straight Dowel
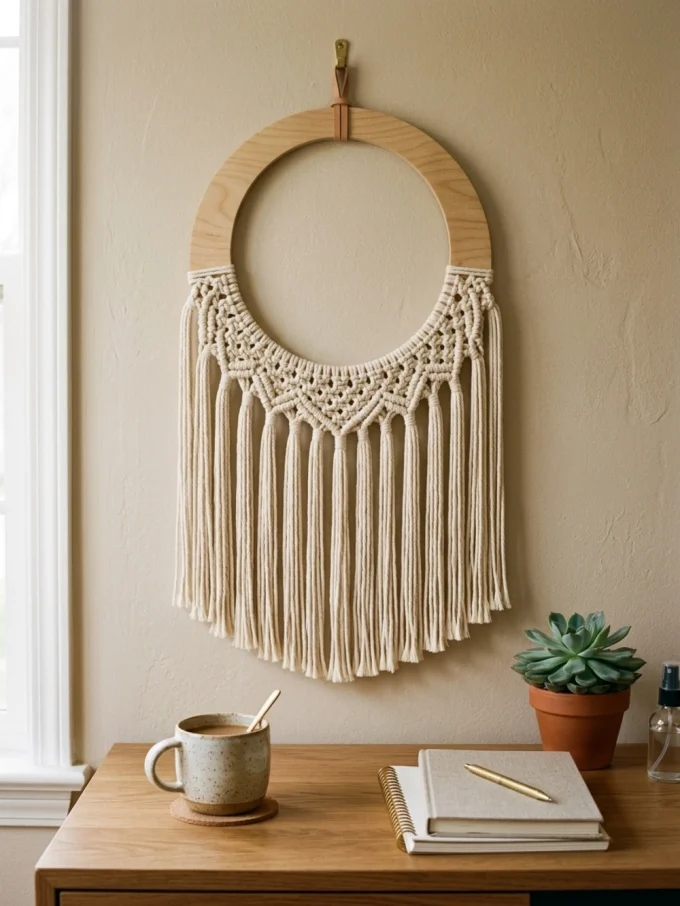
A wooden hoop changes the geometry of the entire project. The circular outline acts as an immediate frame, which means even a relatively simple arrangement of knots can look complete.
Cords can be attached to the upper section and allowed to hang through the center, or concentrated along the bottom so the design extends beyond the circle. Leaving part of the hoop exposed usually creates a stronger result than covering every inch with fiber.
This format is especially useful for smaller walls where a long horizontal dowel would feel too wide. A hoop hanging can also soften the straight architectural lines found around desks, shelving, and cabinetry, making it a natural addition to a thoughtfully arranged home office.
17. Build a Chevron Pattern With Repeated V Shapes
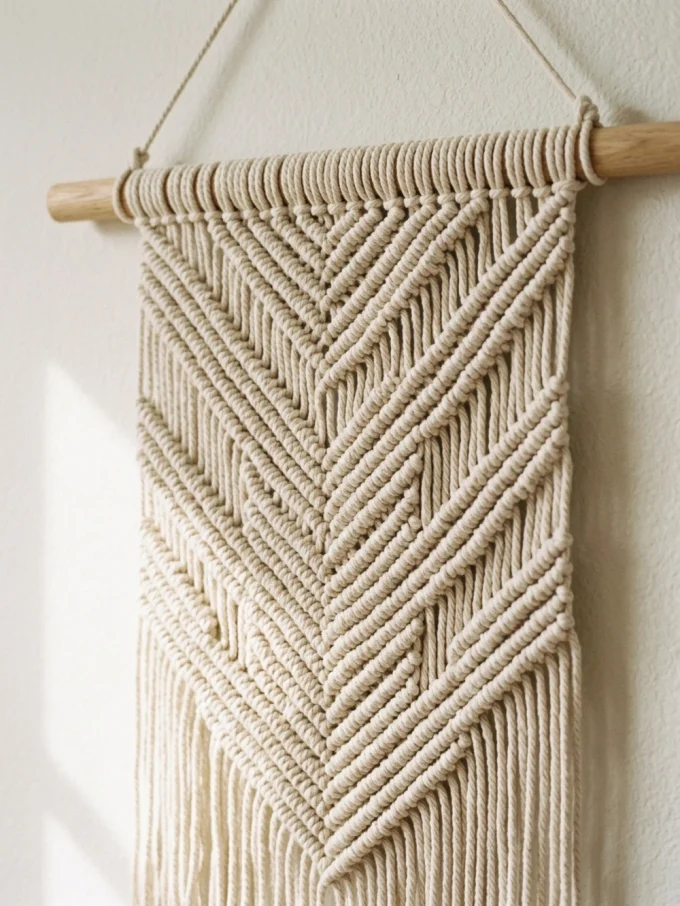
Chevron patterns create directional movement by guiding the eye toward the center and then downward. Repeated diagonal knot lines form V shapes that can remain open or contain smaller Square Knot sections.
The pattern is particularly effective when you want a wall hanging to feel structured without introducing several different techniques. Repetition provides most of the visual complexity.
The center point is the part that requires the most attention. If the two diagonal sides meet at different heights, the whole chevron begins to look uneven. Check both sides after each major row and adjust your tension before continuing.
A simple neutral cord often works best because the geometric shadows already provide enough contrast.
18. Create a Cascading Bottom Edge
Not every macrame wall hanging needs a perfectly straight lower edge. Allowing different sections to finish at different lengths creates movement and can make a large piece feel less rigid.
The center can drop lowest for a symmetrical composition, or the longest section can shift toward one side for a more organic arrangement. Long fringe reinforces the effect because the eye follows the descending line naturally.
Decide on the basic silhouette before making the final trim. One useful approach is to hang the piece upright and mark the intended edge visually before cutting.
Cascading shapes work especially well when the upper half contains structured geometry. The contrast between controlled knots and an irregular lower line prevents the finished piece from feeling too formal.
19. Make Extra-Long Fringe the Main Feature
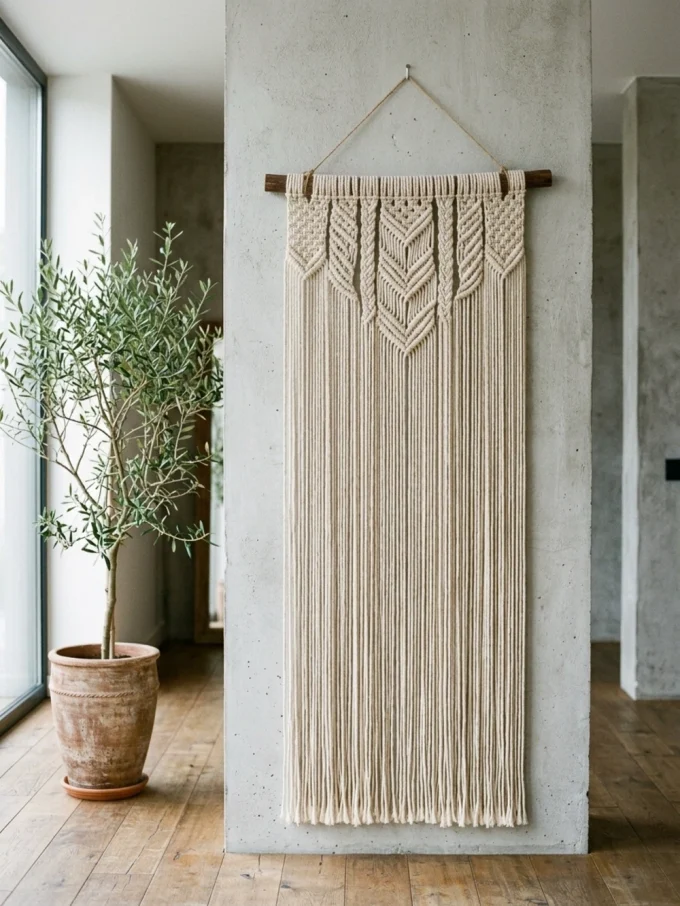
A visually substantial wall hanging does not always require complicated knots from top to bottom. A compact decorative section near the support followed by long loose fringe can create just as much presence.
The upper area provides enough structure to establish the handmade pattern, while the lower fibers introduce vertical movement and softness. This is particularly useful for beginners who want a larger finished piece without learning several advanced techniques immediately.
The wall beneath the hanging matters. Extra-long fringe needs enough clear vertical space to hang freely rather than visually colliding with furniture.
Long fibers can also tangle more easily, especially if they have been brushed apart. Gentle occasional combing helps keep the lower edge looking intentional.
20. Use Leftover Cord for a Smaller Project
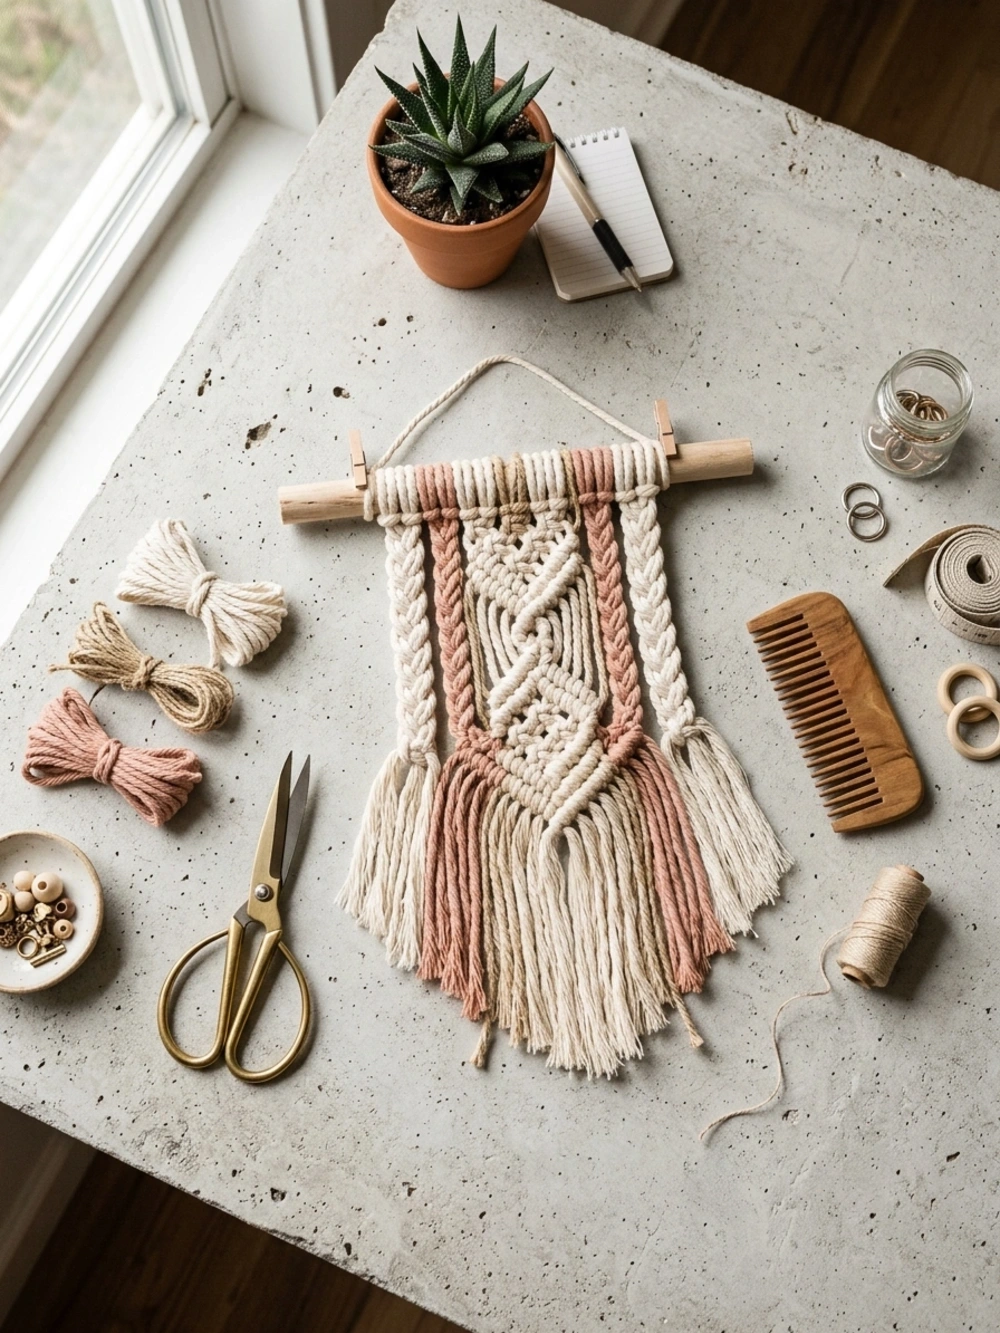
Leftover cord from previous projects can become the basis of a smaller hanging instead of being discarded. The challenge is making the limited materials look deliberately mixed rather than random.
Choose scraps that share some visual relationship. Several warm neutral shades can work together, as can different textures in a single color family. Repeat each material in more than one place so no single strand looks accidental.
A small scrap project is also a good place to test knot combinations before using new cord on something much larger.
Do not force every leftover piece into the design. Editing is still necessary. A restrained selection usually produces a stronger result than using five unrelated colors and thicknesses simply because they are available.
21. Create a Light Coastal-Inspired Hanging
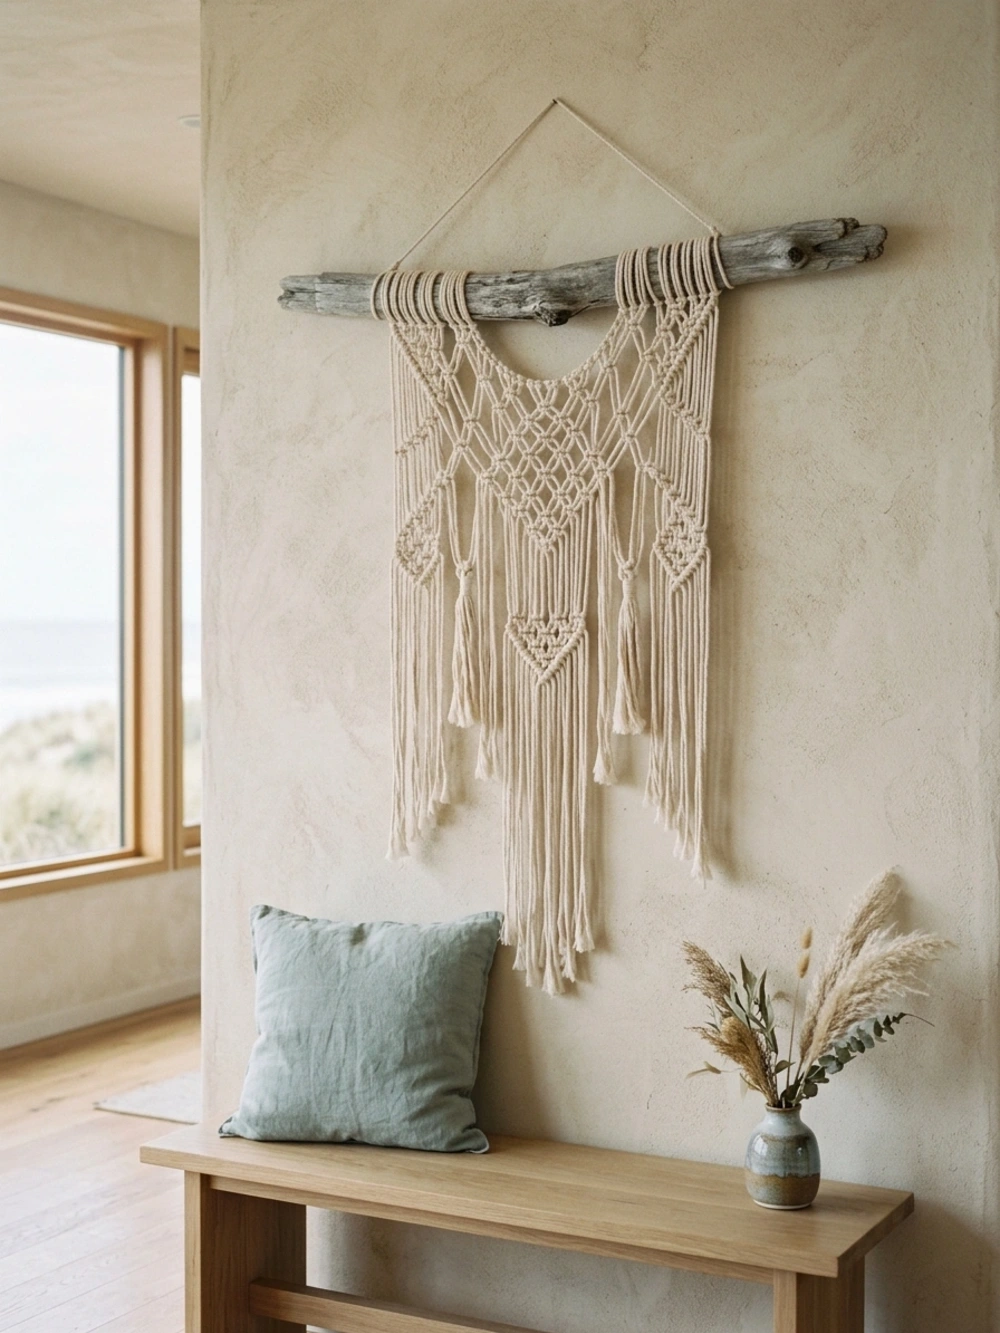
Coastal-inspired macrame works best when the reference is subtle. Pale cord, weathered wood, loose fibers, and generous negative space can suggest a relaxed coastal atmosphere without adding shells, anchors, or obvious nautical decorations.
A natural branch is particularly effective because its irregular texture works naturally with soft ivory fibers. Keep the knot pattern relatively open so the finished piece feels airy rather than dense.
Muted blue can be introduced sparingly, but the design does not require color if the materials already provide enough variation.
This approach follows the same principle behind many strong home decor tips: a style is often more convincing when it is communicated through texture, proportion, and material rather than repeated literal symbols.
22. Build a Warm Boho Macrame Wall Hanging
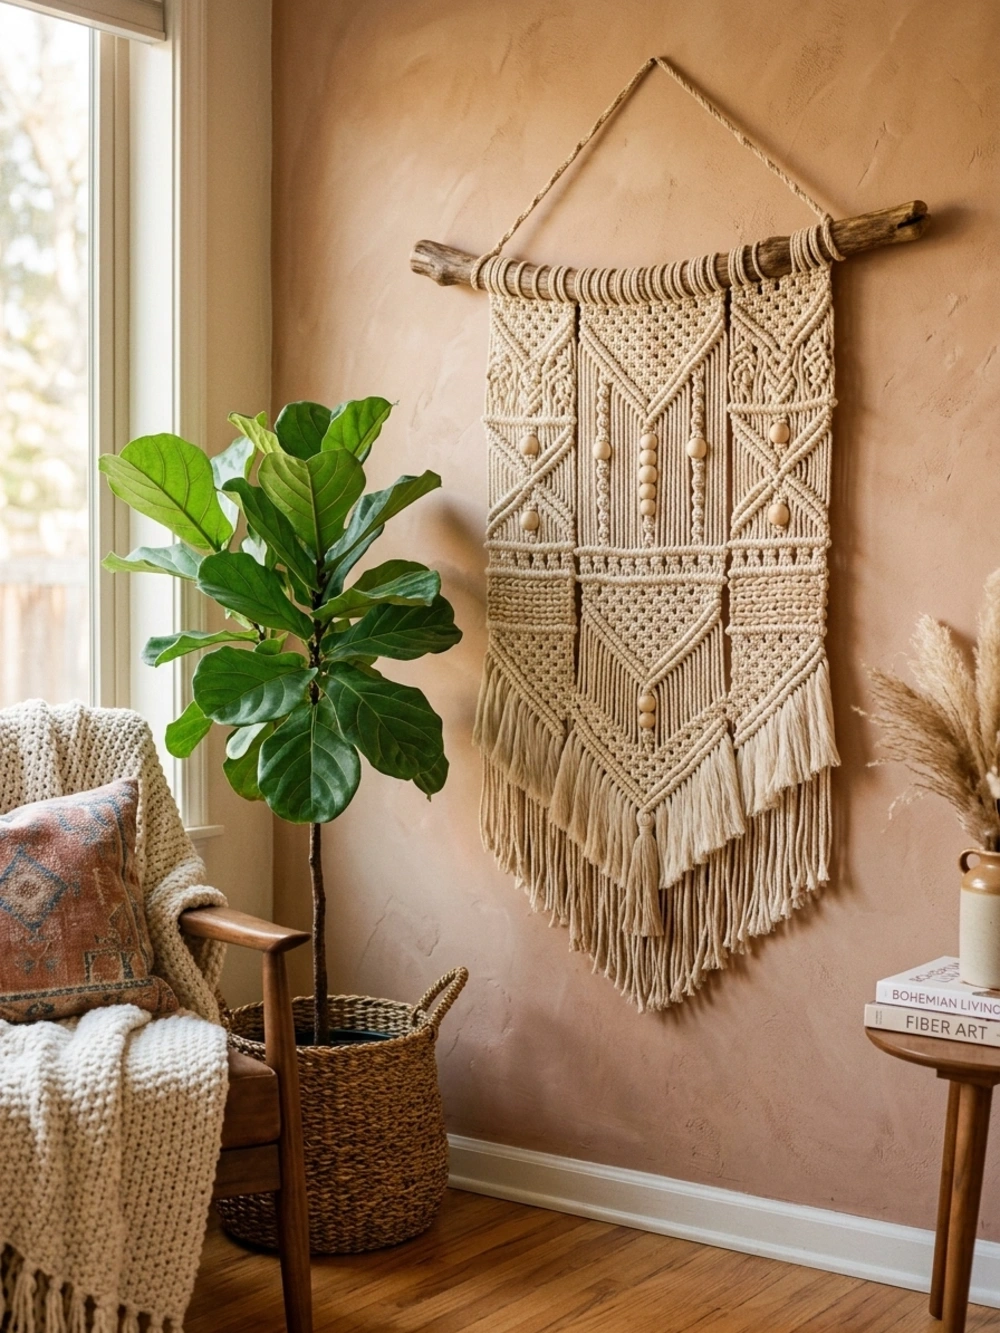
Boho macrame allows more layering than minimalist designs, but it still benefits from restraint. Start with a warm neutral cord and a wood support, then introduce several related textures rather than every possible decorative element.
A few wooden beads, alternating knots, soft fringe, and an irregular bottom edge can create enough visual richness. Plants, baskets, and warm wood in the surrounding room will reinforce the same atmosphere without requiring the macrame itself to become excessively busy.
The main risk is visual clutter. When every section contains a different knot, bead, tassel, and color, the eye has nowhere to settle.
That same editing principle applies throughout interiors and is worth keeping in mind when avoiding common home decor mistakes.
23. Turn Your Practice Knots Into a Sampler
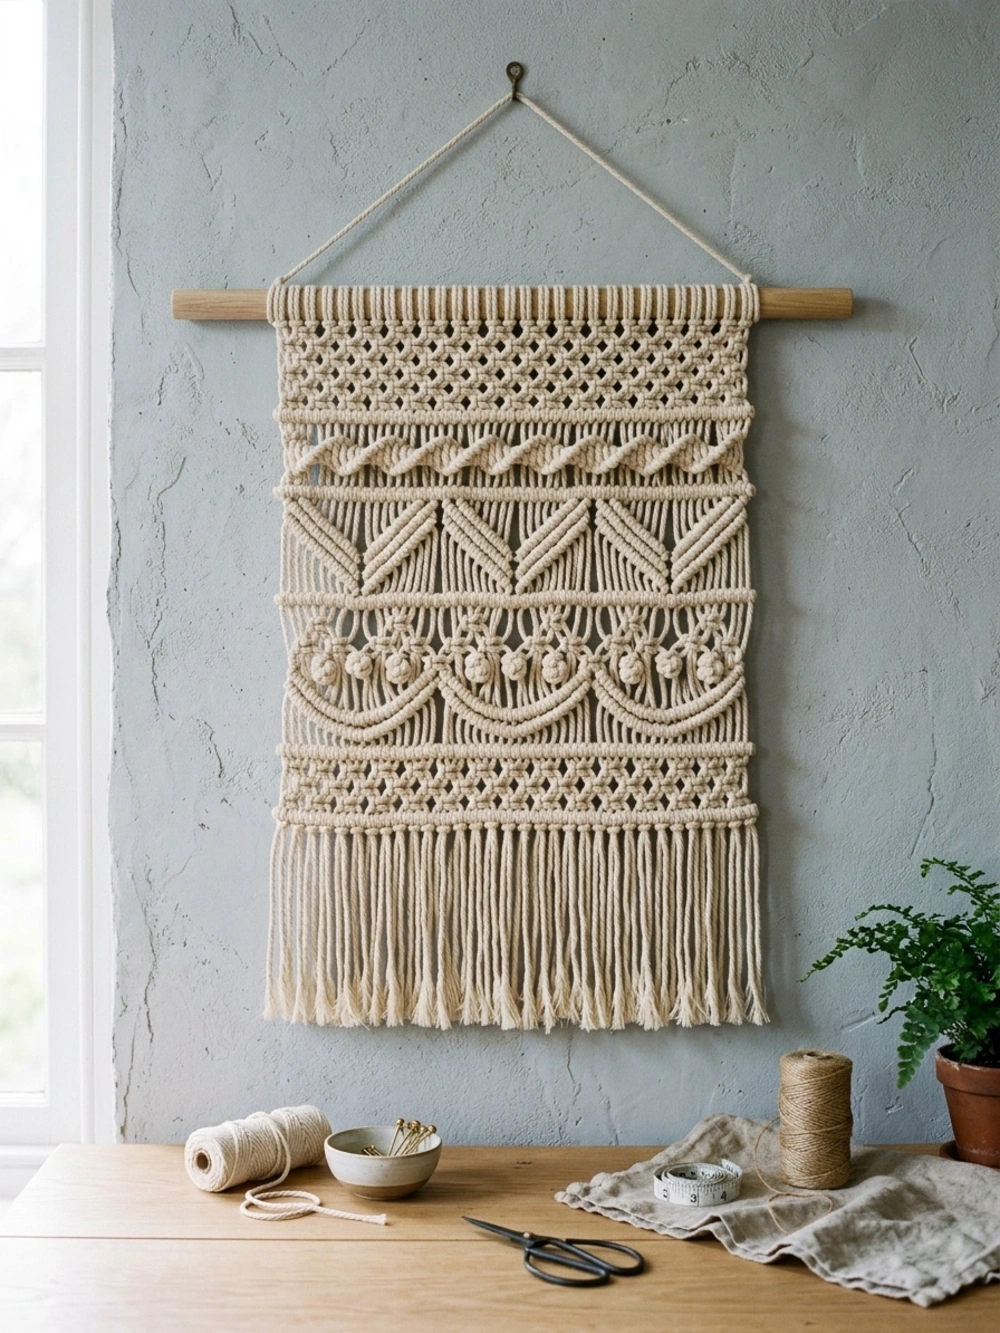
A knot sampler is useful because it functions as both practice and finished decor. Instead of repeating one technique throughout the entire hanging, divide the piece into several sections and use each area to explore a different knot.
One row might contain Square Knots, another spirals, followed by diagonal Double Half Hitches and an open section that shows how the cords behave without dense knotting.
Using one cord color allows the changing texture to remain the main visual feature.
The finished sampler can hang near a craft area as a reference when you begin future projects. It also helps beginners understand how different knots affect cord length, density, and width before they attempt a much larger pattern.
24. Make a Pair of Matching Mini Hangings
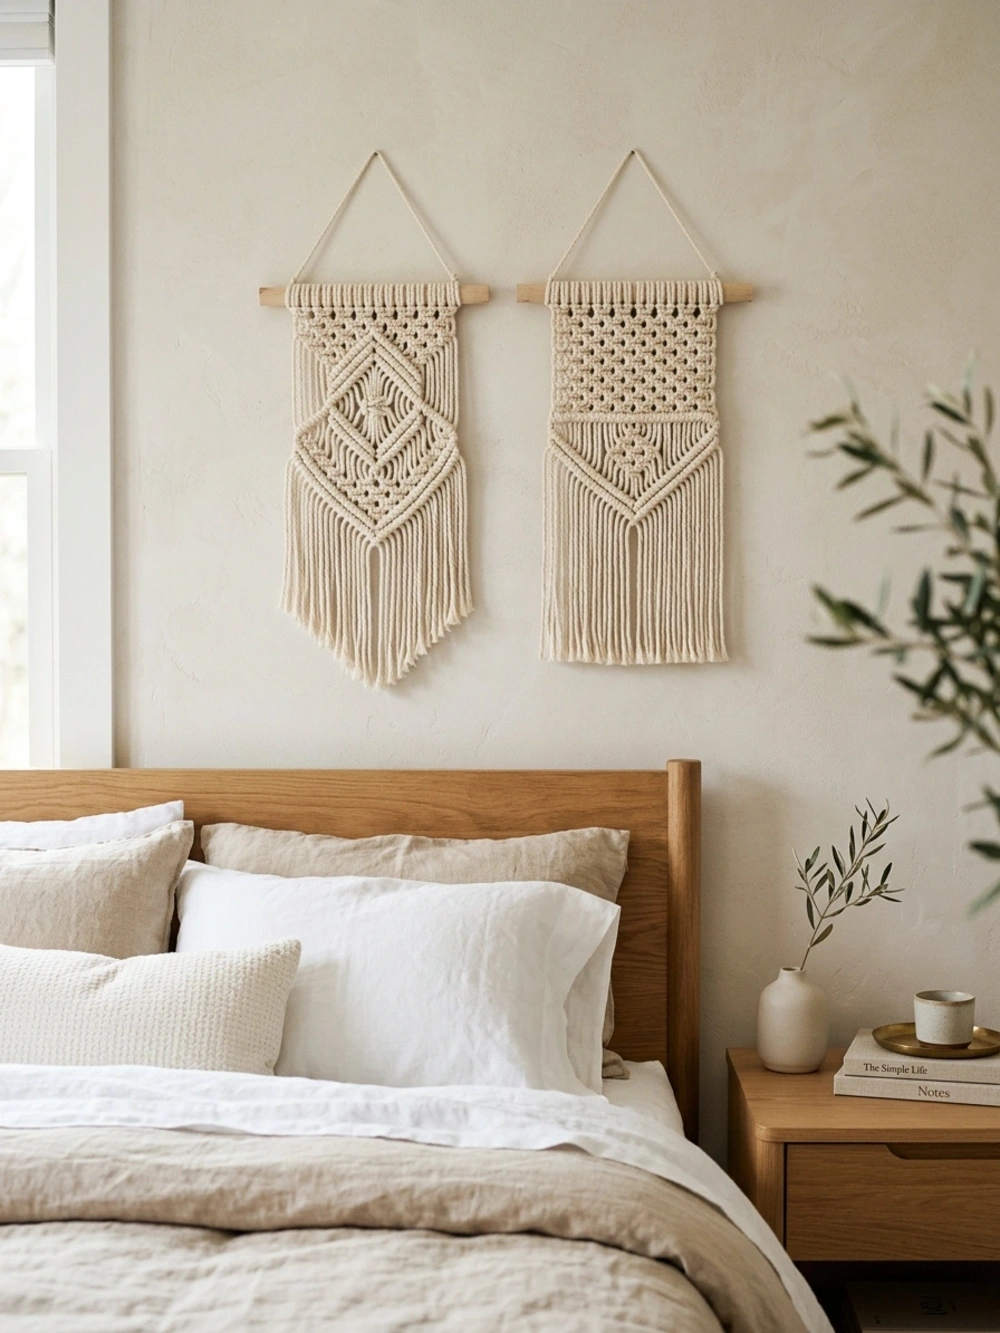
Two related macrame pieces can sometimes create a stronger composition than one larger hanging. The pair can sit above bedside tables, beside a mirror, or within a small gallery arrangement.
Use the same cord and support material so the connection is obvious. The patterns do not need to be completely identical. Slight differences in fringe length, knot placement, or center detail preserve the handmade quality while still allowing the pieces to read as a set.
Spacing matters. If the two hangings are placed too far apart, they may look like unrelated objects rather than one decorative idea.
Small textile pieces also combine well with restrained botanical details, particularly in rooms already using flower home decor ideas.
25. Build One Large Statement Macrame Piece
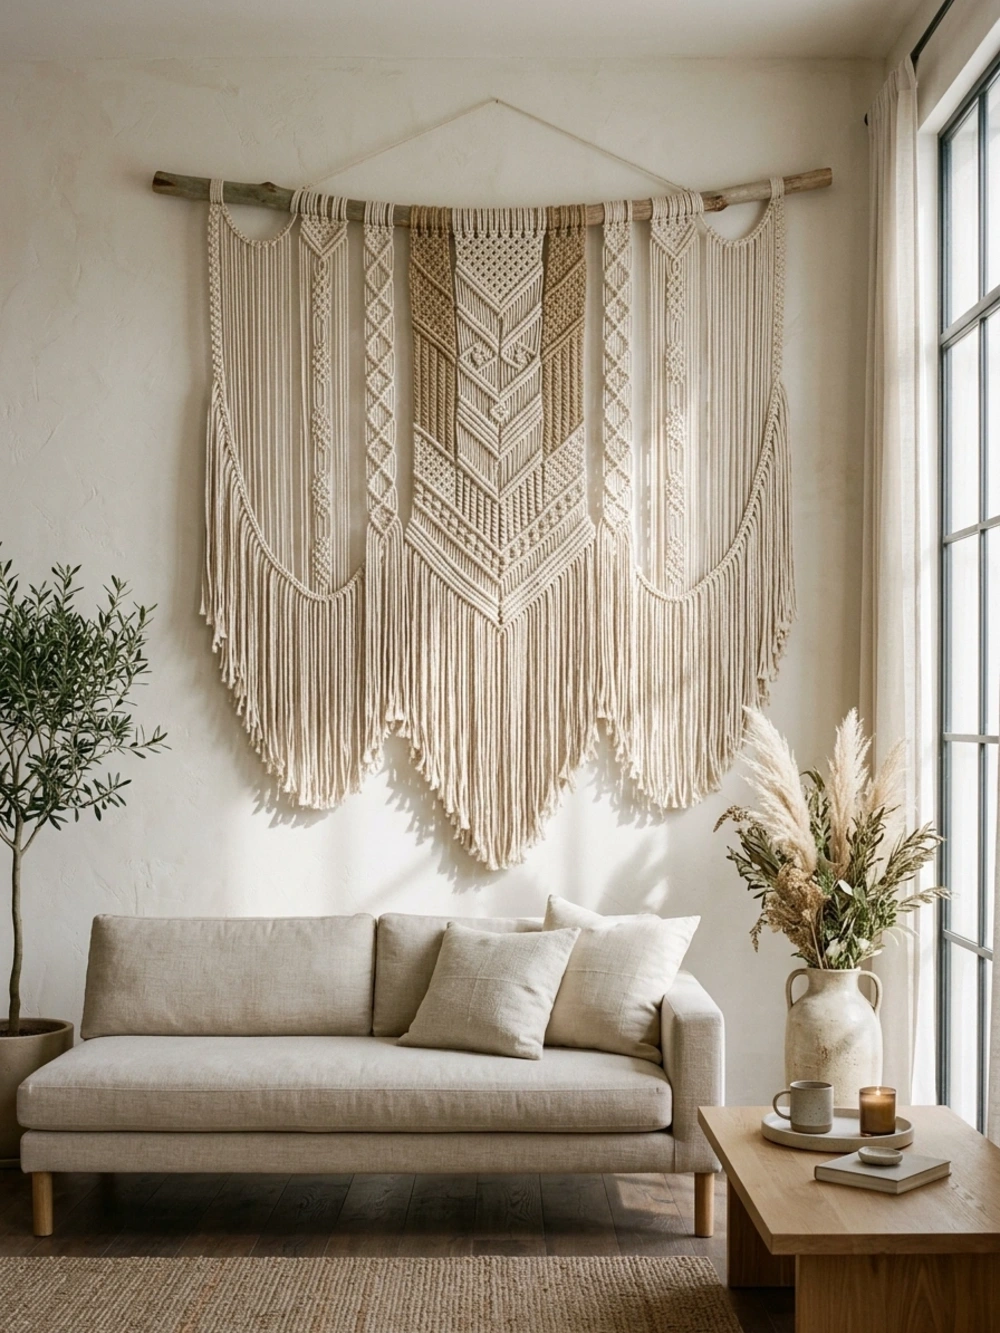
A large statement hanging should not simply contain every knot and decorative technique you have learned. The strongest designs still depend on hierarchy: some areas carry visual weight while others remain open enough to let those details stand out.
Begin with the overall shape rather than the individual knots. Decide whether the hanging will be wide and symmetrical, narrow and cascading, or intentionally uneven. Once the silhouette is clear, place the major patterns inside it.
A central geometric section can provide structure, textured fibers can introduce depth, and longer fringe can soften the bottom. Repeating one or two motifs helps connect the different areas.
Large projects require more planning because small inconsistencies become magnified across a wider surface. Sketch the layout, test unfamiliar knots separately, and allow more cord than a small practice project would need.
How to Choose the Right Macrame Wall Hanging
Choosing the right project is easier when you begin with your current skill level and the wall you actually need to decorate rather than simply selecting the most impressive design.
If You’re Completely New
Start with a small Square Knot hanging, hoop project, narrow vertical piece, or knot sampler. Repetition allows you to improve your tension without having to remember several techniques at the same time.
If You Want Something Quick
Choose a mini hanging, macrame feather, simple hoop design, or a piece where long fringe provides most of the visual impact.
Fewer cords and smaller dimensions generally make the project easier to manage.
If You Need Something for a Large Wall
Look at wide geometric designs, cascading compositions, layered fiber pieces, or one larger statement hanging.
Scale should come from the overall dimensions and composition rather than simply adding more knot types.
If Your Room Is Minimalist
Use a limited palette, fewer knots, simple lines, controlled fringe, and visible open space.
A minimal wall hanging should complement the room rather than become an extremely busy focal point.
If Your Room Is Boho
Natural branches, warm cord, wooden beads, textured fringe, and layered knotting can all work. Choose several related features instead of using every available decorative detail at once.
Common Macrame Wall Hanging Mistakes
Cutting the Cord Too Short
Knots consume more cord than the finished dimensions might suggest. A dense geometric design can use considerably more length than a mostly open hanging.
It is easier to trim excess at the end than discover halfway through a pattern that several working cords are too short to continue.
Using Inconsistent Knot Tension
Tension affects both the size of individual knots and the shape of the entire design. A row tied tightly beside a loose row can create curves or distort geometric sections.
Stop periodically and compare matching areas before moving farther down the project.
Starting With a Project That’s Too Complicated
A large wall hanging with several knot types may look appealing, but it can become frustrating if you are still learning basic cord placement.
Start with one or two knots and introduce new techniques gradually.
Trimming Fringe Before It Settles
Fringe can change shape once it is brushed and allowed to hang naturally.
Finish the knotting first, brush the fibers, hang the piece upright, and then trim gradually.
Using Too Many Decorative Elements
Beads, color, tassels, thick fibers, complicated knots, long fringe, and an unusual branch can all be attractive individually.
They do not all need to appear in the same hanging.
Choose one main feature and allow the rest of the design to support it.
Ignoring the Overall Silhouette
Working close to the knots makes it easy to forget how the entire hanging looks from across the room.
Step back occasionally and evaluate the outside shape, visual balance, empty areas, and relationship between the top support and lower fringe.
Frequently Asked Questions
Is Macrame Difficult for Beginners?
Basic macrame is relatively approachable because many beginner projects rely on only a few repeated knots. A small wall hanging can often be built around Lark’s Head and Square Knots before more complicated techniques are introduced.
The difficulty increases with larger dimensions, multiple knot types, detailed geometry, and mixed fiber techniques.
What Cord Is Best for Macrame Wall Hangings?
Cotton macrame cord is a common choice because it is easy to knot and works well for fringe.
Cord thickness affects the finished appearance. Thicker cord creates larger, more pronounced knots, while thinner cord allows more detailed patterns.
The right option depends on the scale and style of the project rather than one universally correct thickness.
What Macrame Knots Should Beginners Learn First?
Lark’s Head, Square Knot, Half Knot, and Double Half Hitch are useful starting points.
Those four techniques can be combined into simple panels, spirals, chevrons, diamonds, and many other beginner wall-hanging patterns.
Can You Make Macrame on a Tree Branch?
Yes. A clean, dry, sturdy branch can be used instead of a wooden dowel.
The irregular shape is particularly suitable for organic and asymmetrical designs because the support already introduces natural variation.
How Much Cord Do I Need for a Macrame Wall Hanging?
There is no single amount that works for every design.
Cord requirements depend on the finished width and length, cord thickness, number of strands, knot density, knot type, and intended fringe length.
Dense knotting generally uses more cord than sections where the strands remain mostly loose.
How Do You Keep Macrame Knots Even?
Maintain similar tension each time you form a knot and compare matching sections frequently.
For geometric patterns, check that corresponding points on the left and right sides remain at similar heights before continuing to the next row.
How Do You Make Macrame Look More Modern?
Reduce the number of decorative elements.
Use monochromatic cord, clean geometric lines, a simple support, controlled fringe, and more negative space. A restrained macrame piece can introduce texture without automatically making the room feel heavily bohemian.
Final Thoughts
A successful macrame wall hanging does not need the most complicated pattern. Scale, consistent knots, thoughtful spacing, and a strong overall shape usually matter more than the number of techniques involved.
Start with a project that fits your current ability. A small Square Knot hanging or knot sampler gives you time to understand tension and cord behavior without managing dozens of complicated steps. Once those fundamentals feel natural, larger geometric patterns, colored fibers, layered fringe, beads, weaving, and statement designs become much easier to approach.
The goal is not to use every macrame idea at once. Choose the elements that suit your wall and the mood of the room, then build the piece around one clear visual direction. A few techniques used deliberately will almost always look more resolved than a crowded design trying to include everything.